Top 9 Recipes for a Halloween Party Food: Easy Spooky Food Ideas for 2025
Discover the top 9 recipes for a Halloween party food in 2025! From mummy hot dogs to graveyard dirt cups, these easy spooky treats will thrill your guests.
Disclaimer: As an Amazon Associate I earn from qualifying purchases from our site. Thank you for your support!

Halloween is one my favourite times of the year and it’s a bit of a tradition for the last few years now amongst family and friends that I’ve learnt a thing or two about throwing a proper Halloween do. It’s not just about the costumes or decorations, though they certainly help set the mood. Nope, it’s the food that makes people remember your party come November 1st. The right recipes can transform an ordinary gathering into something properly spectacular, and trust me, you don’t need to be Gordon Ramsay to pull it off.
Throughout this guide, I’m sharing my top nine go-to recipes that have never let me down. We’re talking mummy hot dogs, graveyard dirt cups, spider web dip, and loads more. Each one’s dead simple to make, looks absolutely brilliant on the table, and most importantly actually tastes good. Because what’s the point of spooky food if nobody wants to eat it, right?
What Are the Best Make-Ahead Halloween Recipes?
Here’s the thing about hosting parties, you don’t want to spend the entire night stuck in the kitchen whilst everyone else is having a laugh. Been there, done that, got the flour-stained costume to prove it. That’s why make-ahead recipes are your secret weapon.
Most of the recipes I’m sharing today can be prepped at least partially in advance. For instance, you can assemble mummy hot dogs earlier in the day and pop them in the fridge until you’re ready to bake. The graveyard dirt cups? Make those the night before. They actually taste better after sitting for a bit because the cookies get all lovely and soft.
Storage is dead simple too. I use those clear plastic containers from Amazon, the ones with the snap-on lids work brilliantly. Just stack them in your fridge and you’re sorted. For things like dips and spreads, prep them up to 24 hours ahead and keep them covered tightly.
Here’s a great time-saving tip I learnt from my neighbour Sarah: create a prep schedule. Two days before, do your shopping. One day before, prep anything that can be refrigerated. Morning of the party, do final touches. This way, you’re not losing your mind trying to remember if you bought enough hot dogs whilst simultaneously attempting to pipe frosting onto cupcakes.
1. Mummy Hot Dogs – The Classic Halloween Party Starter

Alright, let’s start with the star of Halloween party food. Mummy hot dogs are ridiculously easy, everyone loves them, and they look properly spooky on a platter. I first made these for my nephew’s birthday party (he was born on Halloween, poor kid), and they disappeared faster than you can say “trick or treat.”
Ingredients You’ll Need:
- 2 tins of Pillsbury Crescent Rolls (or any brand of refrigerated crescent dough)
- 16 hot dogs (I prefer beef ones, but use whatever you fancy)
- Yellow mustard or ketchup for the “eyes”
- Optional: small candy eyes for extra effect
Step-by-Step Instructions:
First things first, preheat your oven to 190°C (375°F). Whilst that’s heating up, unroll your crescent dough and separate it into triangles. Now here’s where it gets fun! Use a sharp knife or pizza cutter to slice each triangle lengthwise into thin strips. You want them about half a centimetre wide. Don’t stress about perfection; mummies are meant to look a bit rough.
Take your hot dogs and start wrapping the dough strips around them, leaving a small gap near the top for the face. Cross the strips over each other as you go, just like you’re wrapping bandages. I usually leave about a 2-centimetre gap for the face. The dough is quite forgiving, so if you mess up, just unwrap and start again.
Line a baking tray with baking paper (makes cleanup so much easier), place your wrapped hot dogs on it, and bake for 13-15 minutes. You want the dough to turn that lovely golden brown colour. Once they’re out, let them cool for a couple minutes, then add two dots of mustard or stick on candy eyes. Done!
Top Tips from Experience:
I’ve made these approximately 847 times (give or take), so here’s what I’ve learnt: Cut your hot dogs in half if you want bite-sized versions. They’re perfect for parties where people are standing around chatting. Also, make extra. I’m serious – people will eat more than you think. Last year, I made 30 and ran out within 20 minutes.
For dipping sauces, I set out small bowls of mustard, ketchup, and sometimes a spicy mayo. You can find brilliant serving platters on Amazon. I’ve got one shaped like a coffin that’s absolutely perfect for these.
The beauty of mummy hot dogs is you can prep them in the morning, keep them covered in the fridge, and bake them just before guests arrive. Your house will smell amazing, and people will think you’ve been slaving away all day. Our little secret, yeah?
Amazon Product Recommendations:


2. How Do You Make Spooky Graveyard Dirt Cups?

OK, time to talk about one of the most requested recipes from my Halloween parties. Graveyard dirt cups look absolutely horrifying in the best possible way, and they’re so simple that my 8-year-old niece can make them. Well, with supervision, obviously.
What You’ll Need:
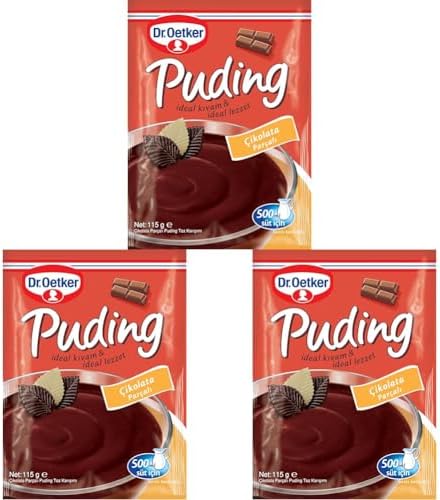
- 1 large box instant chocolate pudding (makes about 6 cups)
- 450ml cold milk
- 1 package Oreo biscuits (the regular ones work best)
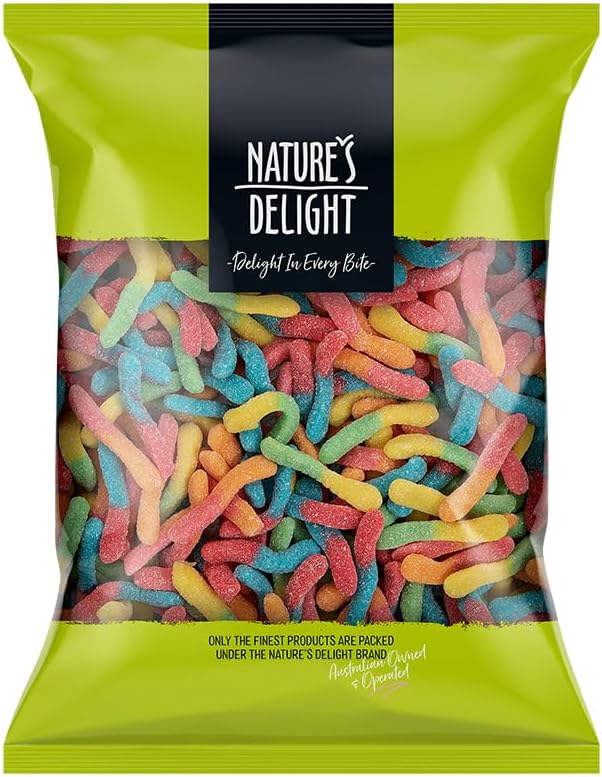
- Gummy worms (loads of them)
- Clear plastic cups (so you can see the layers – dead important)
- Milano biscuits or rectangular tea biscuits for tombstones
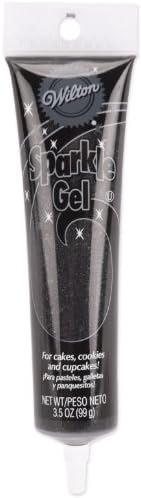
- Black icing pen or gel
How to Make Them:
Start by making your chocolate pudding according to package directions. Whisk it up with the cold milk until it’s nice and thick, then pop it in the fridge for about five minutes to set properly. Meanwhile, grab those Oreos and put them in a large zip-lock bag. Now comes the therapeutic bit – smash them up! Use a rolling pin, a heavy pan, whatever you’ve got. You want them crushed into fine crumbs that look like dirt. Honestly, this is my favourite part. Great stress relief after a long day.
Now for assembly. Spoon a layer of pudding into the bottom of each clear cup – about a third of the way up. Add a layer of crushed Oreos. Drop in a few gummy worms, letting some of them poke out the sides against the cup (properly creepy). Add another layer of pudding, then top with more Oreo “dirt.” Finish by making sure the top is completely covered in crumbs.
For the tombstones, use your icing pen to write “RIP,” names, or spooky messages on the Milano biscuits. Stick one in each cup. If they don’t stand up well, take off a bit of the bottom of the biscuit to create a flat edge (quality control, we’ll call it). Add a couple more gummy worms poking out of the top, and you’re done!
Pro Tips I’ve Learnt:
Make these the night before if you can. The pudding sets firmer and the Oreos soften slightly, which actually makes them taste better. I store them in the fridge with cling film over the top. Just remove the film before serving so the tops stay pretty.
Want to make them a bit more grown-up? Add a shot of coffee liqueur to the pudding before it sets. Trust me, your adult mates will appreciate it. Or don’t tell them and see if anyone notices.
I buy my supplies from Amazon usually. You can get bulk packs of clear cups and gummy worms for decent prices. The icing pens sometimes dry out quickly, so I keep a few spares on hand.
Amazon Product Recommendations:

3. Spider Web Dip – The Show-Stopping Appetiser
If you want people to whip out their phones and start snapping photos, this is the recipe. Spider web dip is all about the visual impact. The first time I made it, my best friend Jamie literally gasped when I brought it out. “How long did that take you?” she asked. I just smiled mysteriously. Truth is, it took about 15 minutes, but she didn’t need to know that.
This dip is essentially a layered Mexican-style dip with a sour cream spider web on top. You can use any base dip you fancy – hummus, guacamole, bean dip, whatever. I’m giving you my favourite version here.
Ingredients:
- 1 tin refried beans (or make your own if you’re feeling ambitious)
- 200g sour cream
- 1 packet taco seasoning
- 200g shredded cheese (cheddar works brilliantly)
- 1 tin diced tomatoes, drained
- 2 spring onions, chopped
- Black olives, sliced
- 1 small jar salsa
- 1 tube black decorating gel or black food colouring
- Tortilla chips for serving
Assembly Instructions:
Grab a large, shallow serving dish – I use a round one about 30cm across. Spread your refried beans across the bottom in an even layer. Mix the sour cream with half the taco seasoning and spread it over the beans. Next layer: cheese. Then tomatoes. Then a light drizzle of salsa. Sprinkle with spring onions.
Now for the spider web. In a small bowl, mix about 100g of plain sour cream with a tiny bit of milk to thin it slightly. You want it pourable but not too runny. Transfer this to a squeeze bottle (you can get them on Amazon, dead useful for loads of things). Starting from the centre of your dip, pipe a spiral of sour cream going outward.
Here’s the clever bit – take a toothpick and drag it from the centre outward through the spiral, spacing the lines evenly around like you’re cutting a pie. This creates that classic spider web effect. Top with a plastic spider if you’ve got one, or make a spider out of a black olive body and chives for legs.
My Spider Web Saga:
First time I attempted this, the sour cream was too thick and I ended up with what looked like white worms on top of the dip. Not quite the effect I was going for. The secret is getting that consistency just right – add milk literally one teaspoon at a time until it flows smoothly.
You can make this several hours ahead. Just cover it tightly with cling film and refrigerate. Don’t add the spider web until about an hour before serving, or it might start to sink into the other layers.
Serve this with a massive pile of tortilla corn chips. I like to get different colours – blue corn chips look particularly good with the Halloween party food theme. You can also cut regular tortillas into bat shapes with a cookie cutter and bake them yourself.
Amazon Product Recommendations:

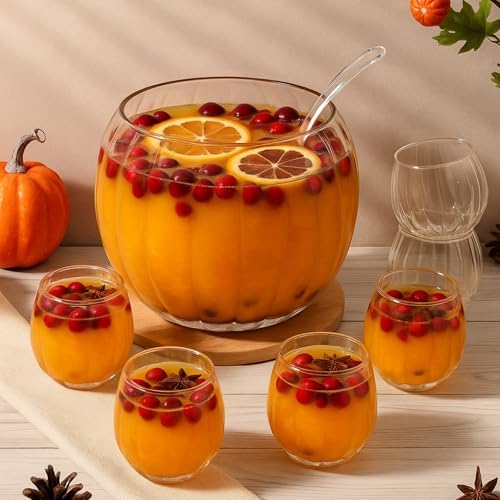
4. What Halloween Punch Recipe Impresses Guests?

Let me tell you about the time I learnt that presentation is everything. I’d made this absolutely delicious punch – perfectly balanced, great flavours, everything you could want. But I served it in a regular punch bowl and nobody was particularly impressed. The following year, I made the exact same punch but served it with a frozen hand floating in it. People went absolutely mad for it. Same recipe, different reaction. That’s when I realised Halloween party food is as much about the theatre as the taste.
Classic Halloween Punch (Serves 12-15):
Ingredients:
- 2 litres orange juice (pulp-free works best)
- 1 litre pineapple juice
- 2 litres lemon-lime fizzy drink (Sprite or 7UP)
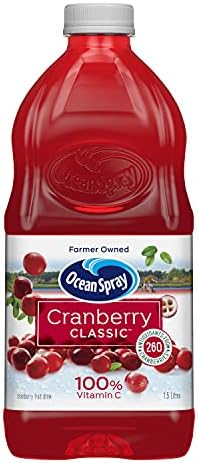
- 1 litre cranberry juice
- Fresh orange slices
- Maraschino cherries
- Gummy worms (for garnish)
- 1 clean rubber glove (for the ice hand – dead important it’s new and unused!)
Instructions:
Here’s how you make the infamous ice hand. Fill a clean rubber glove with water, tie it off tightly at the wrist, and freeze it for at least 24 hours. I usually prop it up in a large plastic container so it freezes in a slightly creepy reaching-up position. The day before your party, make sure you’ve got enough room in your freezer.
When you’re ready to serve, mix your orange juice, pineapple juice, and cranberry juice in a large punch bowl. Give it a good stir. About 30 minutes before guests arrive, add the lemon-lime fizzy drink (do this last so it doesn’t lose its bubbles). Right before serving, cut the glove off the frozen hand and float it in the punch. It looks properly creepy floating there.
Add your orange slices and cherries for colour. I like to drop in a few gummy worms that dangle over the edge of the bowl. Some people think it’s gross, but honestly, that’s rather the point of Halloween, isn’t it?
Adult Version:
Want to make this grown-up? Add vodka – about 500ml for the whole batch should do nicely. Or make two bowls – one boozy, one not. Just label them clearly. Last thing you want is Aunt Margaret getting accidentally sloshed and thinking it was just fruit juice.
Equipment and Serving Tips:
I invested in a good punch bowl set from Amazon a few years back and it’s been worth every penny. Get one with a ladle and matching cups if you can. Makes serving so much easier. I also bought a second smaller bowl for the alcohol-free version.
Make more than you think you’ll need. I usually make one and a half times the recipe above for about 20 people. Also, put your punch bowl on a tray. Drips happen, especially when people are trying to dodge the frozen hand whilst ladling punch. A tray saves your tablecloth.
One year, I froze individual gummy worms in ice cube trays and added those to the punch. Looked brilliant, though a few kids got a bit freaked out. Read the room, as they say.
Your Amazon shopping List:

5. Bloody Pancakes – Start Your Halloween Day Right

Right, I know what you’re thinking, Halloween food for breakfast? Sounds a bit much, doesn’t it? But hear me out. A few years ago, my friends and I started this tradition of having a Halloween breakfast before the evening festivities kicked off. Sort of like brunch, but spookier. And these bloody pancakes became the star of the show.
The genius of this recipe is its simplicity. You’re literally just making regular pancakes and adding a dramatic presentation. No weird ingredients, no complicated techniques. Just plain old pancakes that look like they’ve come from a horror film.
Ingredients for 10-12 Pancakes:
For the pancakes:
- 200g plain flour
- 2 tablespoons sugar
- 2 teaspoons baking powder
- ½ teaspoon salt
- 250ml milk
- 1 large egg
- 2 tablespoons melted butter
- 1 teaspoon vanilla extract
For the “blood” sauce:
- 300g fresh strawberries
- 3 tablespoons sugar
- 1 tablespoon lemon juice
- 2 tablespoons water
How to Make Them:
Start with the blood sauce because it needs time to cool down. Hull your strawberries and toss them in a medium saucepan with sugar, lemon juice, and water. Cook over medium heat, stirring occasionally, until the strawberries break down completely which usually takes about 10 minutes. I like to mash them up a bit with a fork whilst they’re cooking. Once it’s thick and syrupy, remove from heat and let it cool. The sauce will thicken more as it cools down.
For the pancakes, whisk together your flour, sugar, baking powder, and salt in a large bowl. In a separate bowl, beat the egg and add the milk, melted butter, and vanilla. Pour the wet ingredients into the dry and mix until just combined. Don’t overmix as a few lumps are fine. Overmixing makes tough pancakes, and I learnt that the hard way.
Heat a non-stick pan or griddle over medium heat. I usually test it by flicking a drop of water on it, if it sizzles, you’re ready. Pour about 60ml of batter for each pancake. When bubbles form on the surface and the edges look set (about 2-3 minutes), flip them over. Cook for another 2 minutes until golden brown.
The Presentation:
This is where it gets fun. Stack 3-4 pancakes on a plate. Take a butter knife and stick it into the top of the stack at an angle, like it’s been stabbed. Then generously drizzle your strawberry “blood” over the top, letting it run down the sides. The effect is brilliantly gruesome.
My Breakfast Party Experience:
Here’s the thing about hosting a Halloween breakfast, it’s actually quite chill. People are fresh, not tired from a long party. You can do activities like pumpkin carving afterwards. Plus, breakfast food is generally cheaper than dinner food, so you save a bit of money whilst still being festive.
I serve these pancakes with regular maple syrup on the side for those who find the strawberry sauce too dramatic. Some people are surprisingly squeamish about food that looks like blood, even when they know it’s fruit. Also, I always make extra sauce – it’s brilliant on vanilla ice cream later.
Amazon Kitchen Equipment Recommendations:
6. How Do You Create Halloween Deviled Eggs?

Deviled eggs have been making appearances at every family gathering I can remember. My gran made them, my mum makes them, and now I make them. But Halloween deviled eggs? That’s where we get to have a bit of fun with tradition.
I’m not going to lie – the first time I tried to make these spider-topped eggs, they looked more like alien life forms than arachnids. But practice makes perfect, and now I can whip up a platter in about 30 minutes. They’re sophisticated enough for an adult party but fun enough that kids love them too.
Ingredients:
- 12 large eggs
- 3 tablespoons mayonnaise
- 1 tablespoon Dijon mustard
- 1 teaspoon white vinegar
- Salt and pepper to taste
- Paprika for garnish
- Black olives (for spider decorations)
- Chives or thin strips of spring onion (for spider legs)
Step-by-Step Method:
First, you need perfectly boiled eggs. Eggs that won’t peel, eggs with that grey ring around the yolk, eggs that are still runny. Here’s the method that works every single time: Place your eggs in a single layer in a saucepan and cover with cold water by about 2.5cm. Bring to a rolling boil, then immediately remove from heat, cover, and let sit for 12 minutes. Not 10, not 15 – exactly 12.
Whilst they’re sitting, prepare an ice bath – just a large bowl filled with ice and cold water. After 12 minutes, transfer the eggs to the ice bath and let them cool for at least 10 minutes. This stops the cooking process and makes them much easier to peel.
Peel your eggs under running water – it helps the shells come off more easily. Cut them in half lengthwise and carefully pop out the yolks into a bowl. Arrange the whites on your serving platter.
Mash the yolks with a fork until they’re completely broken up. Add mayo, mustard, vinegar, salt, and pepper. Mix until smooth and creamy. I sometimes use a hand mixer for extra smoothness, but a fork works fine if you’re patient. Taste and adjust seasoning – this is important because bland deviled eggs are criminal.
Creating the Spiders:
Spoon or pipe the yolk mixture back into the egg white halves. I use a piping bag with a star tip because it looks fancy, but honestly, two spoons work just as well.
For the spider bodies, cut black olives in half. Place one half on top of each deviled egg. For the legs, cut chives or thin strips of spring onion into 2-3cm pieces. Stick four pieces into each side of the olive to create eight legs. Bend them slightly to make them look more spider-like. You can also use small pieces of black olive for legs if you prefer.
Dust the whole platter lightly with paprika for colour. Some people use red pepper for a more “bloody” effect, but I find paprika less intense.
Make-Ahead Tips:
You can boil and peel the eggs a day ahead. Store them whole in the fridge in a covered container with a damp paper towel. Mix the filling the morning of your party and keep it refrigerated in a covered bowl. Assemble the eggs about 2-3 hours before guests arrive, then keep them chilled until serving time.
Don’t leave deviled eggs out at room temperature for more than two hours. Mayonnaise and warm temperatures are not friends. I keep mine on a bed of ice if it’s a long party.
Amazon Shopping List:
7. Monster Mummy Jalapeño Poppers

Right, let’s talk about something with a bit of kick. These mummy jalapeño poppers combine two brilliant concepts – the classic wrapped mummy look and the deliciousness of cheesy jalapeño poppers. I first had proper jalapeño poppers at a restaurant in Texas during a work trip. Life-changing. When I got home, I started making my own, and eventually, I gave them a Halloween party food twist.
Fair warning though, these are a bit spicy. Nothing too intense, but if you’re serving to people who think black pepper is hot, you might want to make a mild version too. I’ll explain how.
Ingredients for 16 Poppers:
- 8 large jalapeño peppers
- 115g cream cheese, softened
- 100g shredded Cheddar Jack cheese
- ½ teaspoon garlic powder
- ½ teaspoon onion powder
- 2 tins refrigerated crescent roll dough
- 1 egg, beaten (for egg wash)
- Mustard or ketchup for eyes
Detailed Instructions:
First up, cut your jalapeños in half lengthwise and use a small spoon to scrape out all the seeds and membranes. This is where most of the heat lives. Wear gloves if you’ve got sensitive skin, and whatever you do, don’t touch your eyes after handling jalapeños.
In a bowl, mix together the cream cheese, shredded cheese, garlic powder, and onion powder until well combined. If your cream cheese is cold, it won’t mix properly, so let it sit at room temperature for about 30 minutes first. Fill each jalapeño half with the cheese mixture, piling it up nice and high.
Preheat your oven to 190°C (375°F). Unroll your crescent dough and cut it into thin strips, just like we did for the mummy hot dogs. Wrap the strips around each jalapeño, leaving a small gap for the face. The trick is to wrap them whilst the cheese is still cold, warm cheese will squish out everywhere.
Place the wrapped poppers on a parchment-lined baking sheet. Brush them lightly with beaten egg – this gives them a lovely golden colour. Bake for 18-20 minutes until the dough is golden brown and the cheese is bubbly. Let them cool for about five minutes before adding mustard dots for eyes.
Spice Level Tips:
Want them milder? Remove ALL the membranes and soak the jalapeño halves in milk for 30 minutes before filling them. This pulls out a lot of the heat. Or you could use mini sweet peppers instead – they look similar but have zero heat.
For a spicier version (for the brave souls), leave some seeds in or add a dash of cayenne pepper to the cheese mixture. I usually make a mix – half mild, half spicy – and mark the spicy ones by giving them three eyes instead of two.
My Popper Journey:
I’ve been perfecting these for three years now. The first batch was properly disappointing, the cheese all melted out because I didn’t wrap them tightly enough. Then I tried wrapping them too tightly and the dough was tough as old boots. You want them snug but not strangled, if that makes sense.
Also learnt that these are brilliant for meal prep. You can assemble them completely, freeze them on a baking tray, then transfer to a freezer bag once solid. Bake from frozen, just add an extra five minutes to the cooking time. Absolute lifesaver for party planning.
Serve these hot. They’re good at room temperature, but fresh from the oven? Absolutely magical. I put out small bowls of ranch dressing and sour cream for dipping. Some people prefer them plain. Each to their own.
8. Ghost Purse Ravioli – An Elegant Halloween Main

Not everything at a Halloween party needs to be covered in fake blood or shaped like a tombstone. Sometimes you want something that’s genuinely elegant but still fits the theme. Enter ghost purse ravioli, possibly the fanciest thing I’ve ever made, and honestly, they’re not even that difficult.
Ingredients for 20-24 Ravioli:
For the filling:
- 250g ricotta cheese
- 100g grated Parmesan
- 1 egg yolk
- 2 tablespoons fresh basil, chopped
- 1 clove garlic, minced
- Salt and pepper to taste
- Pinch of nutmeg
For assembly:
- 1 package wonton wrappers
- Fresh chives (for tying)
- 1 egg, beaten (for sealing)
- Black sesame seeds or peppercorns for “eyes”
For the sauce:
- 4 tablespoons butter
- 8-10 fresh sage leaves
- Salt to taste
Step-by-Step Instructions:
Start with your filling. In a medium bowl, combine ricotta, Parmesan, egg yolk, basil, garlic, salt, pepper, and nutmeg. Mix until everything’s well incorporated. The nutmeg is key here as it adds this subtle warmth that makes people wonder what the secret ingredient is. I never tell them. Let them wonder.
Lay out a wonton wrapper and brush the edges lightly with beaten egg. Place about a teaspoon of filling in the centre. Here’s where it gets clever: gather up the edges of the wrapper around the filling, creating a little purse shape. Pinch the top together, then tie it closed with a chive. The chive is what makes it look like a ghost. With that little tied top bit looks like a knot on a ghost’s head. Brilliant, right?
Repeat until you’ve used all your filling. I usually get about 20-24 depending on how generous I am with the filling. Arrange them on a baking tray lined with parchment and cover with a damp tea towel whilst you work. They dry out quickly otherwise.
Bring a large pot of salted water to a gentle boil. Working in batches of 6-8, carefully lower the ravioli into the water. They’ll sink, then float to the top when they’re done. Usually about 3-4 minutes. Use a slotted spoon to transfer them to a serving platter.
For the sauce, melt butter in a pan over medium heat. Add sage leaves and cook until the butter starts to turn golden and smell nutty for about 3-4 minutes. Watch it carefully because butter can go from brown to burnt in seconds. Pour this over your ravioli and garnish with more Parmesan if you fancy.
The Ghost Effect:
To make them look more ghost-like, I add two tiny dots of black sesame seeds or crushed black peppercorns as eyes. You could also use black decorating gel if you’re feeling artistic. Some people draw little “O” shaped mouths too, but I think that’s a bit much.
My Ravioli Revelation:
First time I made these, I didn’t have chives. Used thin strips of spring onion instead. Worked fine, but chives look more authentic and they’re softer, so they tie more easily. Also, I once tried to make my own pasta dough instead of using wonton wrappers. Massive mistake. Took three times as long and they honestly didn’t taste better enough to justify the effort. Wonton wrappers is your friend here.
These are best served immediately, but if you need to make them ahead, you can assemble them up to a day before. Arrange them in a single layer on a baking tray, cover with cling film, and refrigerate. Boil them just before serving.
One tip a friend taught me: add a tiny splash of olive oil to your boiling water. Helps prevent sticking. Not sure if it’s scientifically sound, but it seems to work.
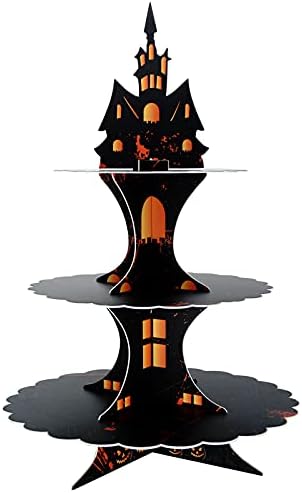
9. Zombie Brain Cupcakes – The Ultimate Halloween Dessert

Right, buckle up. We’re about to make something that looks absolutely disgusting but tastes incredible. Zombie brain cupcakes are the showstopper dessert that’ll have everyone simultaneously impressed and slightly nauseated. Which is exactly what you want for Halloween, right?
I’ll admit, these require a bit more effort than the other recipes I’ve shared. But honestly, if you can make a basic cupcake, you can do this. It’s all about the frosting technique. And trust me, once you nail it, you’ll be making these every year.
Ingredients for 12 Cupcakes:
For the cupcakes:
- 175g plain flour
- 150g caster sugar
- 40g cocoa powder
- 1 teaspoon baking soda
- ½ teaspoon salt
- 1 large egg
- 120ml buttermilk
- 120ml warm water
- 60ml vegetable oil
- 1 teaspoon vanilla extract
For the “brain” frosting:
- 225g unsalted butter, softened
- 500g icing sugar
- 2 tablespoons double cream
- 1 teaspoon vanilla extract
- Pink and red food colouring (gel works best)
For the “blood”:
- 100g strawberry jam
- 2 tablespoons corn syrup
Detailed Baking Instructions:
Preheat your oven to 180°C (350°F) and line a 12-cup muffin tin with cupcake cases. I prefer the plain white ones because they make the brains look more dramatic.
In a large bowl, whisk together flour, sugar, cocoa powder, baking soda, and salt. In another bowl, beat the egg and add buttermilk, warm water, oil, and vanilla. Don’t panic when you see how thin the batter is, chocolate cupcakes are meant to be like this. It makes them super moist.
Pour the wet ingredients into the dry and mix until just combined. The batter will be quite runny. Divide it evenly among your cupcake cases, filling each about two-thirds full. Bake for 18-20 minutes, or until a toothpick inserted in the centre comes out clean. Let them cool completely before frosting. This is crucial as warm cupcakes will make your frosting melt into a weird mess.
The Brain Frosting Technique:
Beat your softened butter until it’s light and fluffy, usually for about 2-3 minutes. Gradually add icing sugar, beating well after each addition. Add cream and vanilla, then beat for another 3-4 minutes until it’s smooth and spreadable.
Divide the frosting into two bowls. Leave one plain white. To the other, add pink food colouring as you want a light pink colour, like the inside of a brain. Mix well.
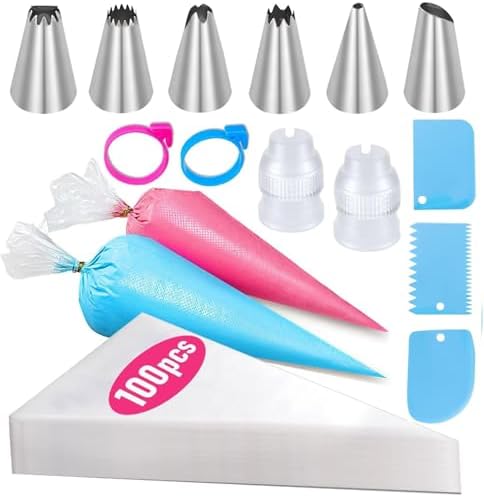
Now here’s the technique I learnt from hours of YouTube videos: Put both frostings into the same piping bag side by side. Use a large round tip. When you pipe, both colours will come out at once, creating that marbled brain effect. Pipe in a circular motion, building up layers to create a dome shape on each cupcake.
Once you’ve got your dome, use a toothpick or the tip of a knife to create crevices and grooves in the frosting, just like the wrinkles in a brain. Don’t overthink it. Random squiggly lines work perfectly. The more imperfect, the better.
Adding the Blood:
Mix your strawberry jam with corn syrup until it’s smooth and slightly runny. The corn syrup makes it shiny and gives it that proper “blood” consistency. Drizzle this over the brain cupcakes, letting it run down the sides. Some people use a syringe for this (which you can buy on Amazon), but I just use a spoon.
My Cupcake Chronicles:
First time I attempted these, I didn’t let the cupcakes cool completely. The frosting slid right off. Second time, I made the frosting too stiff and couldn’t pipe it properly and ended up looking like pink rocks rather than brains. Third time? Absolute perfection. Well, as perfect as something meant to look like zombie brains can be.
I’ve also learnt that gel food colouring is miles better than liquid. Liquid makes the frosting too runny. Gel gives you better colour control without changing the texture.
These cupcakes are best served the day they’re made, but you can bake the cupcakes ahead and freeze them. Just defrost, frost, and serve. The frosting holds up well for about two days in the fridge.
Storage and Serving Tips:
Keep these refrigerated if you’re making them more than a few hours ahead. The buttercream can get soft at room temperature. Bring them out about 30 minutes before serving so they’re not rock hard.
I serve these on a black cake stand with fake spiders around the base. Presentation is everything. First time I made them, I just plonked them on a regular plate. Nobody was that impressed. Second time, with a Halloween themed presentation? People went mad for photos.
Baking Supply List:

Are There Healthy Halloween Party Food Options?
Look, I love all the spooky treats and sugar-laden desserts as much as the next person. But let’s be honest, not everyone can or wants to eat that stuff. My mate Dave is diabetic, my niece has a dairy allergy, and my neighbour’s kid has coeliac disease. Hosting a party means considering everyone, yeah?
The brilliant thing about Halloween party food is that you can make healthier versions that still look absolutely fantastic. I’ve spent the last few years experimenting with alternatives after realising half my guests couldn’t actually eat anything at my party. Felt pretty guilty about that.
Allergy-Friendly Alternatives:
For gluten-free guests, those mummy hot dogs work brilliantly with gluten-free crescent rolls. Honestly can’t tell the difference. The spider web dip? Serve it with veggie sticks instead of tortilla chips – carrots, celery, peppers all work great. Still looks spooky, still tastes good.
Dairy allergies are trickier. For the graveyard dirt cups, you can use coconut milk pudding instead of regular. Won’t lie, it tastes different, but it’s still lovely. The zombie brain cupcakes can be made vegan using plant-based butter and milk alternatives. I’ve tried it, and whilst they’re not identical, they’re pretty decent.
Healthier Spooky Options:
Here’s something I’ve started doing: mandarin orange pumpkins. Peel mandarins and stick a small piece of celery in the top. Boom – healthy pumpkins. Kids love them. I draw little faces on them with edible markers.
Another winner: apple monster mouths. Cut an apple into quarters, spread with almond butter, and stick sliced almonds in as teeth. Looks properly creepy and it’s actually good for you. Though I did have one kid refuse to eat them because they were “too scary.” Can’t win them all.
For drinks, I make a punch using sparkling water, fresh fruit juice, and frozen berries instead of fizzy drinks and added sugar. Add dry ice for effect if you can get it safely. Looks just as impressive as the sugary version.
Current Trends in 2025:
From what I’ve been seeing online and at parties I’ve attended this year, there’s a massive trend towards including more plant-based options. Not because everyone’s vegan, but because it’s just become more normal to have those choices. I make sure at least a third of my party spread is plant-based now.
Another trend is smaller portions. Instead of massive servings, people are doing more variety with smaller portions. Lets guests try everything without feeling stuffed. I’ve started doing this and honestly, there’s less waste too.
The Balance:
Here’s my philosophy: you don’t need to make everything healthy. Halloween is meant to be fun and a bit indulgent. But having options means everyone can participate. I usually aim for about 60% traditional party food and 40% lighter options. That way, people who want to indulge can, and people who can’t or don’t want to aren’t left eating carrot sticks whilst everyone else has cupcakes.
I also always label everything clearly. “Contains nuts,” “Dairy-free,” “Gluten-free” – just little cards next to each dish. Takes five minutes but makes such a difference for guests with allergies. You don’t want someone having an allergic reaction at your party. Trust me on this.
Time to Get This Party Startled!
Right then, there we have it. Nine brilliant recipes that’ll make your Halloween party food the talk of the neighbourhood. From those dead simple mummy hot dogs to the more elaborate zombie brain cupcakes, you’ve now got an arsenal of spooky food ideas.
Here’s what I want you to remember though: the best Halloween party food isn’t about being perfect. It’s about having fun with it. My first attempt at most of these recipes was absolutely rubbish, and you know what? People still enjoyed them because we were all having a laugh. Don’t stress if your spider web dip doesn’t look like it came from a magazine. As long as it tastes good and looks vaguely Halloween-ish, you’re winning.
The key is planning ahead. Pick maybe three or four recipes from this list, don’t try to do all nine unless you’ve got help or genuinely enjoy spending your entire day in the kitchen. Make a shopping list, prep what you can the day before, and leave yourself enough time on the day to actually enjoy your own party.
Remember to consider your guests’ dietary needs and allergies. A little bit of thought about what everyone can eat makes such a difference. Nobody wants to be that person standing awkwardly by the punch bowl whilst everyone else tucks into food they can’t have.
Most importantly, make these recipes your own. Don’t like jalapeños? Make the poppers with something else. Fancy a different filling in the ravioli? Go for it. These are guidelines, not rules. Some of my best recipe discoveries came from accidentally running out of an ingredient and having to improvise.
Now it’s your turn. Have you got a favourite Halloween recipe that absolutely slays at parties? Or maybe you’ve got a disaster story about a Halloween cooking attempt gone wrong? Drop a comment below, I’d love to hear about it. We’re all in this spooky cooking journey together, and honestly, the disasters often make the best stories.
Get in that kitchen, have some fun, and remember: if all else fails, fake blood covers a multitude of cooking sins. Happy Halloween, and may your party be frighteningly delicious!
Halloween Party Food Serving Platter Comparison
| Product | Capacity | Customer Rating | Best For |
|---|---|---|---|
| Coffin Hand Platter | Large (40cm) | 4.5/5 | Mummy hot dogs, poppers |
| Halloween Coffin Serving Tray | Medium (35cm) | 4.7/5 | Deviled eggs, finger foods |
| Pumpkin Punch Bowl Set | 4 litres | 4.8/5 | Halloween punch |
| Plastic Spider Web Platter | Large (45cm) | 4.3/5 | Spider web dip, chips |
| Halloween Cupcake Stand | 24 cupcakes | 4.6/5 | Zombie brain cupcakes |