Ninja Creami Review: Best Frozen Treats at Home
Ninja Creami ice cream maker review: Is it worth buying? Discover features, pros, cons, recipes and whether this frozen dessert machine lives up to the hype.
Disclaimer: As an Amazon Associate I earn from qualifying purchases from our site. Thank you for your support!
Why I’m Obsessed With My Ninja Creami
I’ll be honest, when I first encountered the Ninja Creami, I assumed it was just another kitchen gadget destined to collect dust. But here’s the reality: we spend over $3 billion on ice cream each year, and most of us are simply purchasing the same old tubs from the grocery store. After using the Ninja Creami for the last six months, my perspective has completely shifted. This kitchen gadget isn’t merely about making ice cream; it has truly transformed how my family enjoys frozen treats.
What really grabbed my attention was its incredible versatility. Unlike conventional ice cream makers that need hours of churning, the Ninja Creami operates differently as it takes frozen liquid and turns it into smooth frozen desserts in just minutes. I’ve created everything from Italian-style gelato to fruity sorbets using only my freezer and this single machine. Whether you’re catering to a family of five or just treating yourself after a long day, I’m here to share the truth about whether this investment is worthwhile for your kitchen.
Let’s explore what I’ve discovered.
What Is the Ninja Creami and How Does It Work?
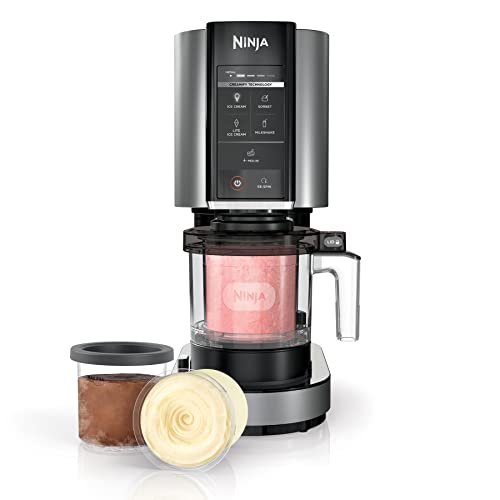
The Ninja Creami is, at its core, a frozen dessert machine that turns pre-frozen liquids into creamy, spoonable treats. It’s not an ice cream maker in the traditional sense, which honestly was my biggest misconception at first. Instead of churning while freezing, you pour your mixture into special containers, freeze them solid (usually overnight), then pop them into the Ninja Creami where spinning blades shave and blend the frozen mixture into the texture you want.
The machine has multiple settings depending on which model you get. There’s the sorbet cycle for icy fruit treats, gelato for denser Italian-style ice cream, slushi for drinks, and smoothie bowl options. I once made a simple strawberry purée, froze it, and honestly expected it to be a complete disaster. Instead, it came out looking like something from a fancy gelato shop.
The process is surprisingly simple once you understand it. You need the special Ninja Creami containers (they come with most models), which are basically thick plastic cups with ridged bottoms. You fill them with your liquid, freeze them solid, then insert them into the machine. The motor spins while internal blades shave downward, creating that creamy texture. The whole cycle takes about three to five minutes, which sounds quick because it genuinely is. I’ve found that the machine works best when containers are frozen at least 24 hours beforehand, though some of my impatient batches turned out okay at 18 hours.
What makes it different from your typical ice cream maker is that there’s no complicated churning mechanism to clean. You’re not dealing with salt and ice or hours of counter space taken up by machinery. It’s genuinely one of the more compact frozen dessert makers available, though I still need to find it decent storage in my cupboard.
Is the Ninja Creami Actually Worth the Money?
Let me cut through the marketing noise here. The Ninja Creami ranges from inexpensive to expensive depending on the model, and honestly, that’s a question only you can answer based on your household. What I can tell you is how I think about the value proposition. If you’re someone who enjoys frozen treats regularly, and let’s be frank, most of us do, this machine pays for itself in less than a year when you compare it to shop-bought ice cream and gelato.
Here’s my math: I spent roughly $120 on the Ninja Creami Deluxe model. A decent tub of premium ice cream costs around $5-7. My family would go through maybe two tubs per week during summer, so that’s $40-56 weekly. With the Creami, I’m spending perhaps $15 weekly on ingredients (fruit, cream, milk, a bit of sugar). That’s a savings of $25-40 per week. By week four, the machine has paid for itself. I’m now into month seven, and I’ve saved enough to buy two more machines if I wanted.
The real value isn’t just financial, though. There’s something satisfying about creating something from scratch. I’ve become that person at family gatherings who brings homemade frozen desserts. That shift in my household’s eating habits and excitement around frozen treats? That’s worth something that spreadsheets can’t quite capture.
That said, if you already have a fully functional ice cream maker and only eat frozen treats occasionally, you probably don’t need this. But if you’re in the market for a frozen dessert solution and you want something that’s quick, space-efficient, and produces genuinely impressive results, the investment makes sense. Think of it like this: you’re not just buying a machine; you’re buying the ability to have restaurant-quality frozen treats whenever you want.
What Can You Actually Make with Ninja Creami?
This is where the Ninja Creami really shows its flexibility. The standard answer is ice cream, but that’s like saying a good kitchen knife is just for chopping. The machine is genuinely versatile if you’re willing to experiment.
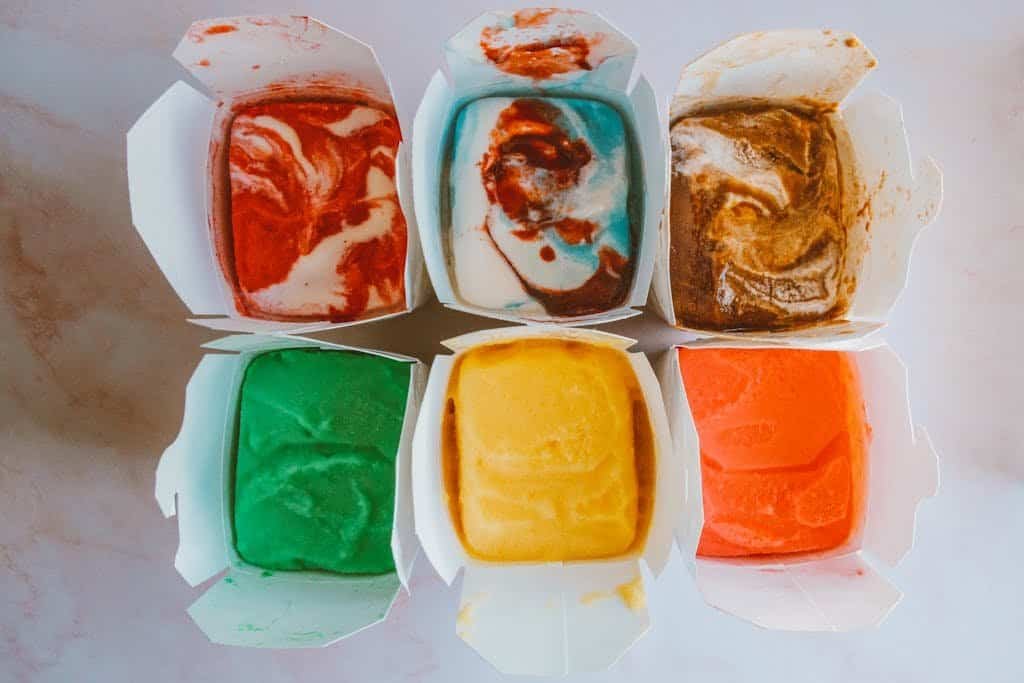
Ice cream and gelato are the obvious ones. You can make traditional ice cream bases with cream and milk, or go richer with custard-based versions. The gelato setting produces that denser, more intense flavour profile that Italian ice cream is known for. I’ve made everything from salted caramel to pistachio, and the results rival what I’ve paid premium prices for in actual gelato shops.

Sorbet and Italian ice are fantastic because they require no dairy. This opened up a whole world for me after I found out one of my dinner guests was lactose intolerant. Now I regularly make fruit sorbets, mango, raspberry, lemon, and honestly they’re some of my favourite creations. The fruit flavours remain incredibly vibrant and authentic-tasting.
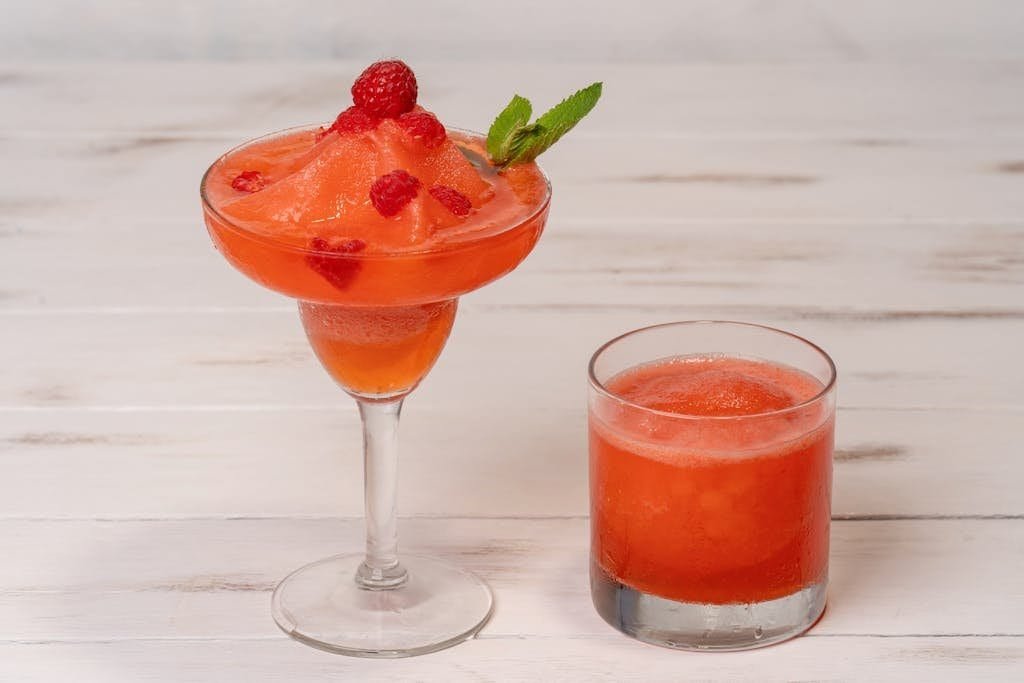
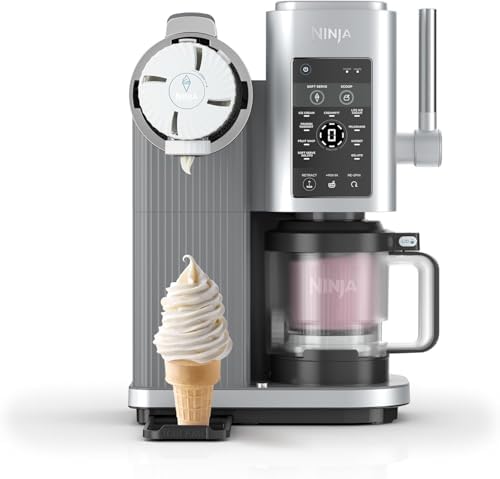
Slushi mode is where it gets fun. You can turn any juice, cordial, or even alcohol-infused liquid into a frozen drink. I’ve made virgin mojito slushis for the kids and, ahem, slightly less virgin versions for adults. One evening I mixed prosecco with fresh raspberry purée, froze it, and turned it into an absolutely magical frozen cocktail. My friend couldn’t believe I made it at home.

Smoothie bowls are possible if your Ninja Creami has that setting (not all models do). You can make them thicker and creamier than traditional blended smoothies, which is brilliant for toppings like granola and coconut.
There’s also gelato pops—I discovered this by accident. I froze ice cream mixture on sticks, inserted it differently, and got something between ice cream and a sorbet bar. My daughter now requests these specifically for her school lunch treats.
The limitation is really just your imagination and willingness to experiment. Unlike traditional ice cream makers that require precise temperatures and churning times, the Creami is forgiving. Even if your mixture isn’t perfectly balanced, the machine usually makes something delicious.
Ninja Creami Models Comparison: Which One Should You Buy?
Ninja’s released several Creami versions over the years, and honestly, it can be confusing which one to choose. Let me break down the main models I’ve researched and what sets them apart.
| Model | Price Range | Container Capacity | Number of Settings | Unique Features | Best For |
|---|---|---|---|---|---|
| Ninja Creami Original | $ | 32 oz | 7 modes | Basic settings, compact | Budget-conscious buyers |
| Ninja Creami Deluxe | $$ | 32 oz | 7 modes | Better motor, quieter | Most home users |
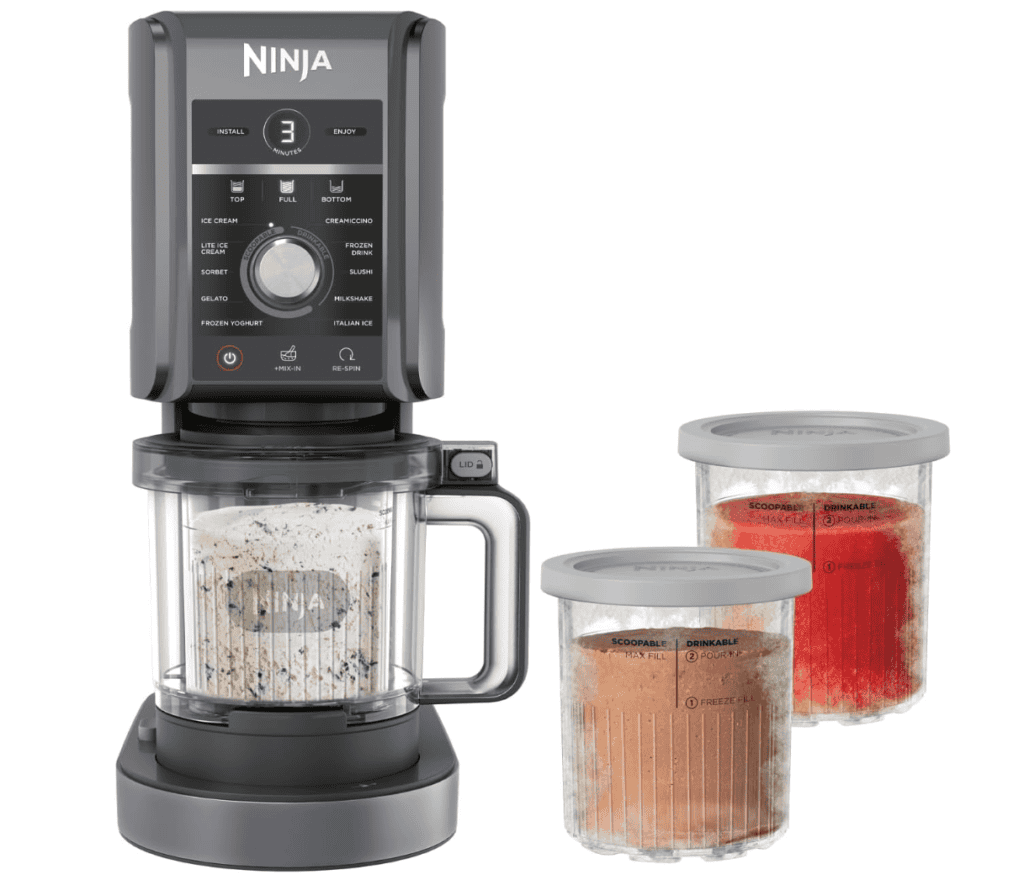
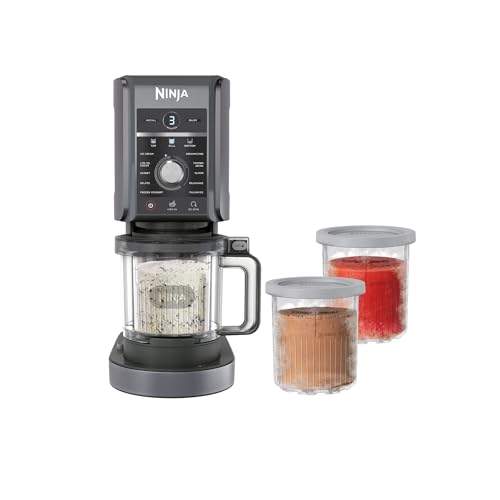
| Ninja Creami Swirl | $$$ | 32 oz | 9 modes | Updated design, improved blades | Those wanting newest tech |
I personally went with the Deluxe model, and I’d recommend it for most people. The price-to-performance ratio is excellent, and the motor is noticeably quieter than the original, which matters if you’re making frozen treats early morning when others are still sleeping.
The Swirl is the newest, featuring a redesigned container and improved blade technology. It’s worth considering if you want the latest and greatest, but I haven’t noticed it produces dramatically different results than the Deluxe based on friends’ machines. Sometimes “newer” doesn’t necessarily mean “better” for your specific needs.
My honest take: Start with either the Original or Deluxe depending on your budget. You can always upgrade later if you find yourself using it constantly. I’ve seen very few people regret starting with the Deluxe as most complaints come from those expecting the Original to be just as quiet and powerful.
Step-by-Step Guide: How to Make Your First Frozen Treat
Alright, let’s actually make something. I’ll walk you through my foolproof basic vanilla ice cream recipe that’s impossible to mess up. Even if you’ve never made frozen desserts before, you’ve got this.
What You’ll Need:
- 1 cup whole milk
- 1 cup double cream
- ½ cup caster sugar
- 2 teaspoons vanilla extract
- One Ninja Creami container (comes with machine)
Instructions:
Step 1: Mix Your Base Pour the milk and double cream into a blender or bowl. Add the caster sugar and vanilla extract. If you’re using a blender, pulse for about 30 seconds until the sugar dissolves. If you’re mixing by hand with a whisk, it’ll take a couple of minutes longer. I usually do this by hand whilst listening to music because, honestly, it’s kind of meditative. The mixture should look smooth and slightly thick.
Step 2: Taste and Adjust This step saved me from making bland batches early on. Take a small spoonful and taste it. Remember that freezing will dull flavours slightly, so your mixture should taste slightly sweeter and more vanilla-forward than your final desired result. If it needs adjustment, add a bit more vanilla (a quarter teaspoon at a time) or sugar. Better to get this right now than discover the problem after 24 hours of freezing.
Step 3: Pour Into Container Carefully pour your mixture into the Ninja Creami container, leaving about a quarter-inch of space from the top. Don’t overfill as I’ve learned this after my first attempt when mixture expanded slightly and made a mess. The container should be about 90% full, leaving room for expansion.
Step 4: Freeze Thoroughly Place the container in your freezer, ideally on a flat surface. Set a reminder for 24 hours. I usually mark my containers with the date using a dry-erase marker on the side, which helps me track what’s frozen and how long it’s been sitting. After 24 hours, the mixture should be completely solid with no soft spots. If you check it at 18 hours and it’s still slightly soft, that’s fine, just give it another hour or two.
Step 5: Prepare Your Machine Take the frozen container and let it sit at room temperature for exactly one minute. This sounds oddly specific, but it helps prevent the container from sticking to the machine’s spindle. Place the machine on a flat, stable surface.
Step 6: Insert and Blend Remove the container from the freezer and insert it into the Ninja Creami, making sure it’s seated properly in the spindle. Most machines have a satisfying click when it’s seated correctly. Now, select your desired mode. For vanilla ice cream, I use the “gelato” setting, which produces a denser, creamier result than the standard ice cream setting.
Step 7: Let It Do Its Magic Close the machine and press start. The whole cycle takes about three to five minutes depending on your model. You’ll hear it working, and honestly, the anticipation is part of the fun. I usually stand there watching because it’s genuinely satisfying to watch the frozen mixture transform in real-time.
Step 8: Scoop and Serve Immediately Once the cycle completes, remove the container and scoop your ice cream directly into bowls. The texture is best when served immediately while it’s still cold and creamy. If you need to store it, pop scoops into a freezer-safe container, but it’ll firm up. This is actually brilliant because you can make fresh batches on demand without storing pre-made ice cream.
Pro Tips I’ve Learned: If your ice cream comes out too icy or crystalline, your mixture probably needs more fat (cream) or more sugar. If it’s too soft, ensure you’re freezing for the full 24 hours and that your freezer is cold enough. I’ve also discovered that keeping my Ninja Creami containers in a dedicated section of the freezer keeps them from getting buried under frozen peas and other necessities.
Best Ninja Creami Recipes and Flavour Ideas
After months of experimentation, I’ve developed some genuine favourites that my family actually requests. Let me share what’s worked brilliantly.
Salted Caramel Gelato remains my gold standard. I make a caramel sauce by heating 100g butter with 150g brown sugar until it smells like toffee (about three minutes). Then I mix 1 cup cream, 1 cup milk, ½ teaspoon sea salt, and let the cooled caramel swirl through. The result is absolutely stunning that is rich, salty, and sophisticated. It’s one of those recipes where people refuse to believe you made it at home.
Strawberry Sorbet is ridiculously simple but tastes like summer. Blend 500g fresh strawberries with ½ cup sugar and 1 cup water, then freeze and process. One evening I added a tablespoon of balsamic vinegar to one batch on a whim, and it elevated the whole thing to something you’d find at a fancy restaurant. The vinegar brings out the strawberry flavour in a way that sounds wrong but absolutely works.
Pistachio Gelato is where I flex a bit. I use actual pistachio paste (available on Amazon) rather than trying to grind my own, which saves time and frustration. Mix 1 cup cream, 1 cup milk, ½ cup caster sugar, and 3 tablespoons pistachio paste. The natural pistachio colour is stunning, and the flavour is nutty without being overpowering. My mum tried this at Christmas and asked me to make it for her birthday party.

Mango Lassi Slushi came from an evening when I had leftover mango purée and was feeling creative. I mixed 1 cup mango purée with ½ cup yoghurt, ¼ cup honey, and a sprinkle of cardamom, froze it, then ran it through the slushi cycle. It’s basically a frozen yoghurt drink with Indian spice notes. It’s brilliant on warm afternoons when you want something refreshing but substantial.
Lemon Cheesecake Gelato combines two things I love. I blend 1 cup cream, 1 cup milk, ½ cup caster sugar, 100g softened cream cheese, juice of 2 lemons, and the zest of one. The cream cheese makes it unbelievably creamy, and the lemon keeps it from being too rich. I’ve served this at dinner parties and it’s genuinely fooled people into thinking I’d bought it from somewhere fancy.
Espresso Chocolate Gelato is my go-to for adults. I dissolve 2 tablespoons instant espresso powder in 2 tablespoons hot water, then mix with 1 cup cream, 1 cup milk, ½ cup caster sugar, and 2 tablespoons cocoa powder. It’s intensely flavoured and absolutely delicious. I’ve learned to make this without the espresso too, which gives a pure chocolate version that somehow tastes even better.
Tropical Fruit Sorbet happened when I bought too much pineapple and papaya. I blended them together with a bit of lime juice and sugar, froze it, and now it’s a summer staple. The colour is gorgeous, and it’s genuinely refreshing on hot days. I sometimes add a splash of coconut milk for richness.
The beauty of the Ninja Creami is that there’s literally no wrong answer. Even my failures have been delicious. I once forgot to add sugar to a berry mixture, and it came out as concentrated berry perfection. The machine’s forgiving nature means you can experiment without worrying you’ve wasted ingredients.
Pros and Cons: The Honest Truth About Ninja Creami
Let me give you the unvarnished truth. The Ninja Creami is brilliant, but it’s not perfect, and there are things you should know before committing.
The Genuine Advantages:
Speed is massive. I can have frozen desserts ready to eat in five minutes once everything’s frozen. Traditional ice cream makers require churning time and temperature control; the Ninja Creami eliminates all that complexity. The learning curve is genuinely minimal. I made decent stuff on my first attempt, which isn’t true for most kitchen gadgets.
Space efficiency matters more than I expected. This machine is compact compared to traditional ice cream makers. It sits on my counter taking up roughly the space of a toaster. I’ve got friends with those big churning machines that basically have a permanent home in their kitchen because moving them is a production.
The variety is legitimately impressive. You’re not just making ice cream; you’re making sorbets, gelatos, slushis, and drinks. I’ve gotten way more use out of this machine than I would have from a traditional ice cream maker because of that versatility.
Texture quality is brilliant. The Ninja Creami produces genuinely creamy results that rival expensive gelato shops. The blades are apparently designed to break down ice crystals properly, resulting in that smooth mouthfeel that makes cheaper frozen desserts feel grainy.
Clean-up is straightforward. Unlike traditional machines with complex motors and churning mechanisms, the Ninja Creami just needs the container and blades rinsed. I spent maybe two minutes washing up after each use. Compare that to other kitchen appliances and it’s honestly refreshing.
The Genuine Limitations:
Planning ahead is essential. You can’t spontaneously decide you want ice cream; you’re freezing things 24 hours in advance. This is fine for regular consumption but inconvenient if you suddenly fancy something. I got round this by having containers pre-made during summer, but it required some forethought.
Container quantity matters. Most machines come with one or two containers. If you’ve got a family or entertain frequently, you need multiple containers. I eventually bought extra containers from Amazon, which added to my total investment. Plan on getting at least two or three extras.
Freezer space can be tight. These containers aren’t tiny. If you’ve already got a packed freezer, the Ninja Creami might force you to play Tetris with your frozen goods. In summer, I ended up reorganising my entire freezer strategy.
Texture depends on mixture composition. Too much sugar and your result gets icy; too little and it’s too hard. Whilst the machine is forgiving, getting perfect results requires understanding the science a bit. I had several batches that were slightly off before I figured out the right ratios. Now it’s second nature, but there’s a learning curve.
The containers, whilst convenient, are single-use per batch. You can’t just top up an old container and refreeze; you need fresh containers for each new batch. This is fine, but it’s a consideration compared to traditional machines where you can make batch after batch.
Some models are louder than others. The Original model can be surprisingly loud for the size of it. The Deluxe and above are quieter, but if noise is a significant issue for you, test it before buying or go for the premium models.
Motor longevity questions remain. The Ninja Creami is relatively new technology, so we don’t have 20 years of data on how long these machines last. My machine is fantastic, but I can’t guarantee it’ll still work perfectly in five years. That said, most reviews suggest they’re pretty robust.
Is Ninja Creami Better Than Traditional Ice Cream Makers?
This is the question everyone asks, and honestly, the answer is “it depends on what matters to you.”
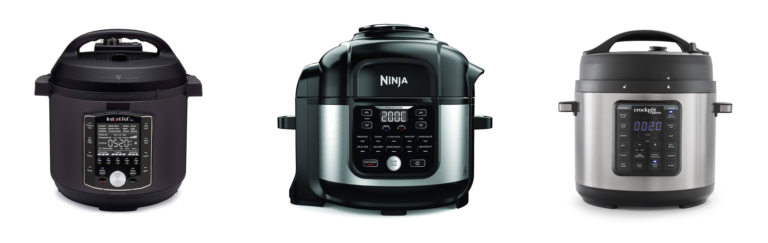
Traditional ice cream makers, the churning kind, require you to combine ingredients, then churn them whilst they freeze, which typically takes 20-40 minutes depending on the machine. The process is more complex, and they take up significantly more space. However, they do produce a certain texture that some people argue is superior because the continuous churning creates specific ice crystal structures.
The Ninja Creami, on the other hand, requires no churning. You prepare your mixture, freeze it solid over 24 hours, then process it in minutes. It’s fundamentally a different approach to achieving similar results.
Where the Ninja Creami wins: Speed once everything’s frozen, space efficiency, ease of use, versatility (you can make sorbets and non-dairy options), and simplicity. If you want frozen desserts with minimal fuss and maximum variety, the Ninja Creami is brilliant.
Where traditional machines might win: If you’re making ice cream constantly and want to avoid the 24-hour freezing wait, traditional machines eliminate that. You can make batch after batch without waiting. Also, some serious ice cream enthusiasts argue that the churning process creates a superior texture. Whether this is genuine or just preference, I honestly can’t definitively say.
For most home cooks like myself, the Ninja Creami is superior. I’d rather have quick, easy, delicious results than deal with the complexity of traditional churning. But if you’re an absolute ice cream enthusiast who wants to experiment with precise churning speeds and temperature control, a traditional machine might appeal to you more.
Cleaning, Maintenance, and Durability: What to Expect
Here’s where I’ll share what I’ve learned about keeping this machine in good working order because honestly, the manual doesn’t tell you everything.
Cleaning is straightforward. After each use, I remove the container and rinse it under warm water. The included scooper and blades usually just need a quick rinse too. The main motor unit doesn’t get wet directly, so you just wipe the outside with a damp cloth if needed. I usually do this entire process whilst my ice cream is sitting for a minute before serving, so it doesn’t add any real time to the process. Every couple of weeks, I run the blades and container through the dishwasher, which works brilliantly.
Container care matters. These containers are thick plastic, but they’re not invincible. I’ve learned not to force them into the machine as they should slide in smoothly. I also don’t microwave the containers even though I was tempted to defrost one quickly. The heat can warp them, making them not fit properly in the machine. If a container gets stuck, I run it under lukewarm water for a minute, which softens any ice slightly and usually frees it up.
Motor maintenance is minimal. There’s not really any maintenance required. The machine doesn’t have gears or complicated internal mechanisms that need lubrication. Occasionally, I’ll just make sure the spindle (the part the container sits on) is clean and dry. That’s genuinely it. The machine’s reliability has been impressive so far with no weird noises, no performance degradation over six months of regular use.
Durability seems solid. I’ve had mine for a few months now, and it’s still performing identically to when I first got it. The motor hasn’t lost power, the blades still create smooth textures, and there’s no grinding or unusual sounds. Online, I’ve read of people using their Ninja Creami for years without issues. That said, like any appliance, there’s always a risk of failure. Ninja does offer warranties (usually 1-2 years depending on the model), which provides some protection.
Longevity tips: Keep it on a stable surface and don’t force the container into the machine. Clean it properly after each use rather than letting residue dry and harden. Store the containers flat rather than stacking heavy things on top of them. Avoid submerging the motor unit in water. Do these things and you should get years of use from this machine.
Common Problems and Troubleshooting Tips
Despite being generally reliable, I’ve encountered a few issues worth knowing about so you can avoid them or fix them quickly.
Problem: Ice cream comes out too icy or crystalline
This was my biggest issue initially. The mixture freezes with large ice crystals instead of that smooth, creamy texture. The solution is almost always your mixture composition. Ice cream needs fat and sugar to prevent large crystal formation. Make sure you’re using full-fat cream (not lower fat alternatives) and adequate sugar. I learned that increasing cream content from ½ cup to ¾ cup whilst reducing milk made a dramatic difference. Also, make sure your freezer is cold enough with a freezer at 0°C is ideal, but if it’s warmer, crystals form more easily.
Problem: Container won’t seat properly in the machine
This usually means either the container is frozen at an angle or there’s residual ice on the seating surface. Let the container sit at room temperature for 2-3 minutes, which melts surface ice slightly. Wipe the spindle (the part the container sits on) with a dry cloth. Usually, this solves it. One time mine was stuck because I’d frozen it with uneven weight distribution. Running it under lukewarm water for a minute freed it up.
Problem: Motor won’t start
First, check that the container is actually fully seated as most Ninja Creami models won’t start without proper seating for safety. Second, ensure you’re pressing the button correctly. Sounds obvious, but I’ve done this. Third, check that it’s properly plugged in and the outlet is working. If none of these work, your machine might need servicing. I’ve not had this issue, but it would warrant contacting Ninja support.
Problem: Result is too soft, almost melting
This usually means you didn’t freeze long enough or your freezer isn’t cold enough. Give it the full 24 hours minimum. If it’s still soft, your freezer might be set warmer than ideal. Most freezers should be around -18°C. If you’ve got an older freezer, this might be worth investigating.
Problem: Result is too hard and won’t scoop
You’ve probably over-frozen or your mixture has too little fat or sugar. The mixture should be hard but not rock-solid. If it’s literally impossible to scoop, let the container sit at room temperature for 5-10 minutes, which slightly softens the surface. You could also add a bit more cream to your next batch.
Problem: Weird noise coming from the machine
If you’re hearing grinding or scraping sounds, the container might be rubbing against the machine housing. This usually means it’s not seated properly. Restart the cycle and make sure the container is fully inserted. If the noise persists, stop the machine immediately and check for debris. I’ve never had this issue, but it’s possible something could have gotten into the motor area.
Most problems are actually just learning curves. Once you understand how your specific freezer behaves and how your mixture needs to be composed, these issues largely disappear.
Best Accessories and Add-Ons for Your Ninja Creami
If you’re committed to becoming a Creami enthusiast like I’ve become, some accessories really enhance the experience.
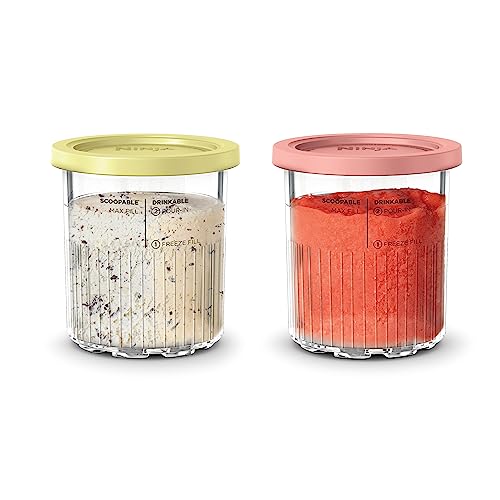
Extra Containers are genuinely essential if you plan to make batches regularly. The standard machine comes with one or two, but having three to four containers means you can have multiple flavours ready simultaneously. I got a four-pack from Amazon, and it’s been brilliant. I’ll have vanilla pre-frozen for emergencies, fruit sorbet for weekday lunches, and something more adventurous for weekends.

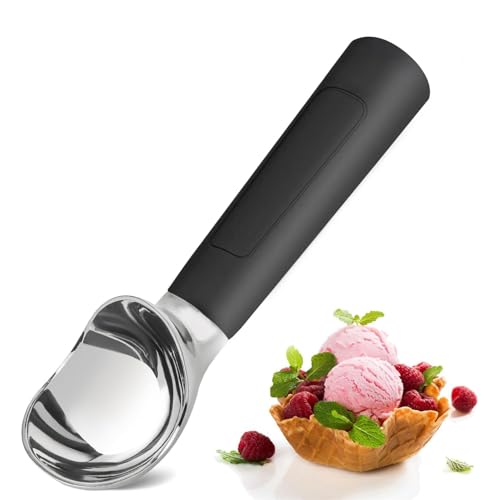
Scoops and serving utensils matter more than you’d think. The standard scoop that comes with the machine is fine, but I bought a heat-responsive scoop (one where warmth from your hand slightly softens it) from Amazon, and it genuinely makes scooping easier. Sometimes the difference between a pleasant experience and a frustrating one is just having the right tool for the job.
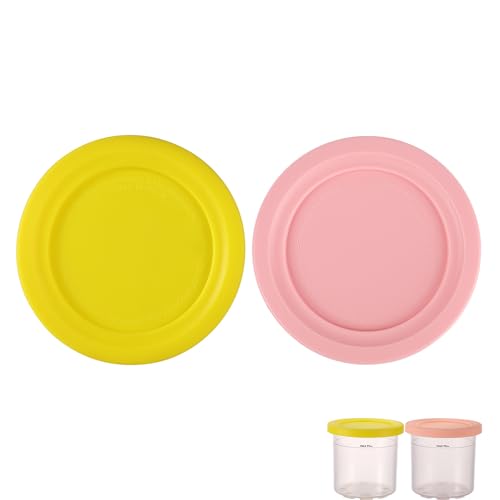
Container lids are brilliant for storing pre-frozen mixtures or finished ice cream in the freezer without worrying about freezer burn. I got a set of compatible lids for relatively cheap on Amazon, and they’ve saved me from several batches getting that crystallised, icy texture from prolonged freezer exposure.
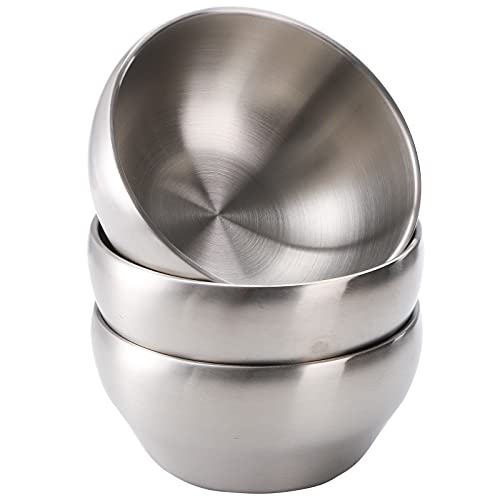
Insulated serving bowls aren’t specifically Creami accessories, but they’re genuinely useful. I got a set of freezer-safe bowls that keep ice cream cold longer whilst serving. It sounds fancy, but it’s actually just practical because ice cream melts quickly in room-temperature bowls, especially during summer.
The Ninja Creami Recipe Book is available separately if you want structured recipes and ideas. Honestly, I’ve gotten most of my inspiration from the internet, but having a physical book is nice if you’re not someone who likes scrolling on their phone whilst cooking.

Flavouring syrups and concentrates from Amazon expand your options dramatically. I’ve used brands like Mr. Kipling’s concentrated syrups and real fruit purées to create more complex flavours. These aren’t Ninja-specific, but they’re genuinely useful when your imagination needs a boost.
Where to Buy and Current Pricing Guide
Right, let’s talk about actually acquiring one of these machines because pricing varies wildly depending on where you shop and what model you want.
Amazon is typically your best bet for price and selection. Most Ninja Creami models are available, often with Prime shipping, which means you get it within two days. Prices usually range from inexpensive for the Original to a higher price for the Supreme. I’ve seen occasional discounts, especially during Black Friday and Prime Day. The advantage is easy returns if something arrives faulty.
Ninja’s official website occasionally runs promotions and sometimes includes recipe books or containers with purchases. Direct from manufacturer sometimes feels nice, though shipping takes longer than Amazon.
Independent kitchen retailers occasionally have models, sometimes at slightly better prices than chain stores. It’s worth checking local options if you have them.
I’d recommend buying from Amazon (for fast delivery!) unless you have a specific reason to shop elsewhere. Both offer good pricing, easy returns, and reliable delivery. Avoid buying grey market imports or significantly discounted machines from unknown sellers as the warranty protection often isn’t worth the savings.
Time to Chill Out: Your Ninja Creami Decision Made Simple
After months of genuine, regular use, I’m confident recommending the Ninja Creami to most people who enjoy frozen desserts. It’s not perfect, but it’s genuinely excellent for what it does.
Get the Ninja Creami if: You enjoy frozen treats regularly and want restaurant-quality results at home. You value ease of use over traditional churning methods. You want versatility with sorbets, gelatos, slushis, and more. You’ve got limited counter space. You’re willing to plan ahead and freeze mixtures 24 hours in advance.
Skip the Ninja Creami if: You need spontaneous frozen treats without advance planning. You’re not willing to dedicate freezer space to containers. You’re a hardcore ice cream enthusiast who specifically values churning-based texture. You rarely eat frozen desserts anyway.
I’ve genuinely changed how I think about frozen treats because of this machine. What started as curiosity has become a hobby. My family now expects homemade frozen desserts, and honestly, I’ve stopped buying supermarket ice cream almost entirely. The Ninja Creami made that possible.
The best part? Creating something from scratch, watching my kids’ faces light up when they taste something I’ve made, and knowing exactly what’s going into their food. That’s worth far more than the initial investment.
If you’re on the fence, I’d genuinely encourage you to take the plunge. Buy from somewhere with good returns policies so you can send it back if it doesn’t work for you. But I reckon most people who try the Ninja Creami become genuinely enthusiastic about it, just like I have.
Have you got experience with the Ninja Creami? I’d love to hear what you’ve created or whether you’re thinking about getting one. Drop your thoughts in the comments below. I genuinely read and respond to every comment, and your experiences might help other readers decide too.
Happy freezing, and enjoy your next bowl of homemade frozen perfection!