Best Ninja Creami Recipes (2026): 7 Tested & Delicious
Turn your kitchen into an ice cream shop! These 7 tested Ninja Creami recipes deliver professional, decadent results every time. Healthy, boozy, and classic options included.
As an Amazon Associate I earn from qualifying purchases from our site. Thank you for your support!

Listen, I’ll never forget the day I unboxed my Ninja Creami. My family looked at me like I’d lost the plot with another kitchen gadget taking up precious bench space. Fast forward to today, and we’re fighting over who gets to pick their favourite Ninja Creami recipes to make for tonight’s dessert! If you’ve been scrolling through TikTok watching people transform protein shakes into actual ice cream (yes, really), you’re in the right place.
The Ninja Creami has absolutely exploded in popularity since its 2021 release, and honestly? It’s changed how I think about frozen treats. According to recent searches, this machine turns frozen bases into creamy desserts like ice cream, gelato, and sorbet. I’m talking proper, scoopable, restaurant-quality ice cream that you can customise to fit whatever diet or craving you’ve got going on.
What Makes the Ninja Creami So Special?
Right, so you might be wondering what all the fuss is about. I mean, ice cream makers have been around forever, haven’t they? The Ninja Creami is different, and I’ll tell you why.
Unlike traditional ice cream makers that churn while freezing, the Ninja Creami freezes your base first, then uses a spinning blade to shave the frozen mixture into a smooth texture. It’s more like a Pacojet if you’re familiar with professional kitchen equipment that basically shaving frozen ingredients layer by layer until you get that perfect consistency.
What I love most is the flexibility. With my old ice cream maker, I’d have to make a massive batch and then figure out what to do with it all. The Ninja Creami makes just one pint at a time, which means I can have vanilla tonight, chocolate tomorrow, and some weird experimental flavour the next day without wasting anything. Plus, there’s no churning for 20 minutes while the mixture freezes. You prep it, chuck it in the freezer, and come back when you’re ready.
The machine also has this brilliant “re-spin” feature. First time I used it, my ice cream came out looking like frozen gravel. I panicked. But then I hit re-spin, and boom! we got silky smooth perfection. It’s honestly saved so many batches that would’ve been failures otherwise.
For anyone tracking macros or trying to eat healthier, this machine is genuinely a lifesaver. You control every single ingredient that goes in. No hidden sugars, no mysterious stabilisers, no ingredients you can’t pronounce. Just real food turned into something that tastes absolutely naughty but fits your nutritional goals.
Can You Really Make Restaurant-Quality Ice Cream at Home?

I was pretty skeptical about this claim. Like, come on, how could a home machine compete with what you’d get from a fancy gelateria? But after making literally multiple batches, I can hand on heart say yes, you absolutely can.
The secret is in understanding a few basic principles. Professional ice cream has that incredible texture because of the right balance of fat, sugar, and stabilisers. The Ninja Creami lets you replicate this at home. I’ve found that using liquid sweeteners like agave syrup or maple syrup adds body, stability, and creaminess to your ice cream, which is exactly what the pros do.
Cost-wise, it’s brilliant. A pint of decent protein ice cream from the shops will set you back about $8-12. My homemade version costs maybe $2-3, depending on what protein powder I’m using. Even factoring in the initial cost of the machine, I’ve probably saved hundreds of dollars already. Plus, the quality is honestly better than most stuff you can buy.
Time investment is surprisingly minimal once you get the hang of it. Yeah, you need to freeze your base for ideally 24 hours (though I’ll let you in on a shortcut later). But the actual hands-on time? Maybe 5 minutes to mix your ingredients, then another minute or two to spin it. That’s less time than driving to the shops and back.
The texture you get is genuinely comparable to premium ice cream. That dense, creamy mouthfeel that makes you close your eyes with that first bite? You can achieve that at home. I’ve served my Ninja Creami creations to friends without mentioning they were homemade, and the reactions are always priceless. “Where did you get this from?” Oh, from my freezer.
Ninja Creami Recipe #1 – Classic French Vanilla Bean Ice Cream

This is where everyone should start. Seriously. A proper, rich vanilla ice cream is the foundation of everything, and once you nail this, you’ll understand why people lose their minds over the Ninja Creami. This isn’t your average vanilla, it’s the real deal with actual vanilla beans.
Ingredients:
- 1 cup heavy cream
- ¾ cup whole milk
- ½ cup sweetened condensed milk
- 1 whole vanilla bean (or 2 teaspoons vanilla bean paste)
- 2 tablespoons granulated sugar
- Pinch of salt
What You’ll Need:
- Ninja Creami Machine (obviously!)
- Queen Pro Vanilla Beans – the real stuff makes all the difference
- Nestle Sweetened Condensed Milk – adds richness and sweetness
- Premium Heavy Cream – full fat only

Instructions:
First, grab your Ninja Creami pint container. Pour in your heavy cream and whole milk. Don’t even think about using low-fat options here as the fat content is what makes this absolutely luxurious.
If you’re using a vanilla bean (and you should at least once to experience the difference), split it lengthwise with a sharp knife. Scrape out all those gorgeous little seeds with the back of your knife. Add both the seeds AND the pod to your mixture as the pod adds extra flavour as it sits.
Add your sweetened condensed milk. This is doing double duty here through sweetening and adding that thick, creamy texture that makes you close your eyes with pleasure. Stir in your sugar and pinch of salt. The salt enhances all the other flavours without tasting salty itself.
Mix everything thoroughly with a whisk until the sugar dissolves completely. If you’re using vanilla bean paste instead of a whole bean, add it now. The mixture should look creamy and smell absolutely incredible.
Pop it in the freezer WITHOUT the lid on. I can’t stress this enough. Freezing with the lid on creates a raised lump in the middle, which can damage your machine’s blade. I learned this the expensive way. Freeze for at least 24 hours for best results.
When you’re ready to eat (and trust me, the anticipation is real), take your pint out of the freezer. If you used a whole vanilla bean, fish out the pod before spinning as it’s done its job. Lock it into the Ninja Creami machine, select the “Ice Cream” setting, and let her rip.
After the first spin, check the consistency. It should look creamy with those beautiful vanilla bean specks throughout. If it needs it, hit “Re-Spin” once for extra smoothness.
Pro Tips:
Real vanilla beans are expensive (about $3-5 each), but the flavour is incomparable. If you’re on a budget, good quality vanilla bean paste is the next best thing, just a tablespoon works perfectly.
Don’t throw away that vanilla pod after you’ve scraped it! Rinse it, let it dry, then stick it in a jar of sugar to make vanilla sugar. It’s brilliant in coffee or on top of buttered toast.
This recipe has become my gold standard. Sometimes I’ll add a swirl of raspberry coulis after spinning, or mix in some crushed honeycomb. It’s also the perfect base for making proper sundaes with hot fudge sauce and whipped cream.
Ninja Creami Recipe #2 – Decadent Chocolate Peanut Butter Swirl
Alright, if vanilla is the sensible daily driver, this one’s the weekend treat that makes you forget you’re eating “healthy” food. The combination of chocolate and peanut butter is absolutely classic for a reason as it just works.
Ingredients:
- 1½ cups chocolate milk or chocolate protein shake
- ½ cup heavy cream
- 2 tablespoons natural peanut butter
- 1 tablespoon cocoa powder
- 2 tablespoons maple syrup
- 1 scoop chocolate protein powder
- Pinch of salt
For the Swirl:
- 2 tablespoons peanut butter, melted
- 1 tablespoon dark chocolate chips, melted
Shopping List:
- Cadbury Drinking Chocolate – proper chocolate flavour
- Mayver’s Peanut Butter – no added sugar, pure peanuts
- Lindt 70% Dark Chocolate – for melting, not eating (who am I kidding)


Method:
Start by combining your chocolate milk and heavy cream in the Ninja Creami pint. The cream adds richness that takes this from “nice” to “oh my god, is this actually healthy?” territory. Give it a good stir.
Add your peanut butter. I prefer natural peanut butter because it doesn’t have all the added sugar and oils, but if you’ve only got the regular stuff, it’ll still work. Mix it in thoroughly, you want it distributed evenly, not in big globs.
Sift in your cocoa powder. This is one ingredient where quality matters. Dutch-processed cocoa gives a smoother, less acidic flavour. Mix until there are no lumps visible. I usually give it about 50 stirs, but that might just be my compulsive counting thing.
Pour in your maple syrup and add your protein powder. Here’s a tip I wish someone had told me earlier: casein or blended whey-casein protein powders create better texture than pure whey. Pure whey can get a bit icy unless you compensate with extra fat.
Add a small pinch of salt as it enhances the chocolate flavour and balances the sweetness. This is one of those tiny changes that makes a massive difference. Pop it in the freezer, again without the lid, for 24 hours.
When it’s frozen solid, spin it on the “Ice Cream” setting. After the first cycle, it should look fairly smooth. Now for the fun bit, creating the swirl.
Melt your peanut butter in the microwave for about 15 seconds until it’s pourable. Do the same with your chocolate chips (I usually add a tiny splash of coconut oil to help them melt smoothly). Use a spoon to create several holes in the ice cream, then drizzle both the peanut butter and melted chocolate into these holes.
Hit the “Mix-In” button. The Mix-In function spins more gently than the regular cycle, which gives you nice swirls rather than completely mixing everything together. It’s perfect for this application.
Common Mistakes:
Don’t make the swirl before freezing. I tried this thinking I’d save time, and it just froze into weird streaks that didn’t taste right. The texture was off too.
Watch your peanut butter quality. The ultra-processed stuff with palm oil can separate oddly when frozen. Natural peanut butter (just peanuts and maybe salt) works so much better.
Serving Suggestions:
This one’s incredible served slightly soft, maybe 5 minutes after spinning. The peanut butter swirl stays a bit softer than the ice cream base, creating this amazing textural contrast. Sometimes I’ll crumble a few pretzels on top for a salty crunch. Heaven.
Ninja Creami Recipe #3 – Refreshing Strawberry Cheesecake Ice Cream
I stumbled onto this recipe by accident. Had some strawberries that were about to turn, some cream cheese in the fridge, and thought “why not?” Best happy accident ever. Blending cottage cheese or Greek yogurt with strawberries creates a creamy, tangy base that the Ninja Creami transforms into a rich, frozen cheesecake texture.
Ingredients:
- 1 cup fresh or frozen strawberries
- 4 oz (115g) cream cheese, softened
- ½ cup Greek yogurt
- ½ cup milk (whole milk preferred)
- 3 tablespoons honey or maple syrup
- ½ teaspoon vanilla extract
- 1 graham cracker, crushed (optional)
Brands That Work:
- Philadelphia Cream Cheese – the classic for a reason
- Chobani Greek Yogurt – thick and creamy
- Arnott’s Graham Crackers – for that cheesecake base flavour
Complete Instructions:
If you’re using fresh strawberries, hull them and chop them roughly. Frozen ones work just as well and actually, sometimes better because they’re already soft when you blend them. Chuck them in a blender or food processor first. You want them properly pureed, not chunky.
Soften your cream cheese in the microwave for about 20 seconds. Adding cream cheese to Ninja Creami recipes guarantees an always creamy dessert. It’s one of those secret ingredients that makes people wonder how you got such good texture. Add it to your strawberry puree and blend until completely smooth.
Transfer this mixture to your Creami pint. Add your Greek yogurt, milk, honey, and vanilla extract. I usually go for Greek yogurt rather than regular because the extra protein and thickness helps with the final texture. Mix everything thoroughly. I mean really thoroughly as you don’t want cream cheese lumps in your finished product.
Freeze for 24 hours. I know I keep banging on about this, but it genuinely makes a difference. Ninja recommends 24 hours because it ensures your base is completely solid, giving you the best, most consistent results.
When frozen, process on the “Ice Cream” setting. First spin might look a touch grainy, but that’s normal with fruit-based recipes. Re-spin once or twice until you get that silky texture. The strawberries have natural fiber that can make things slightly less smooth than pure dairy recipes, but it should still be pretty close.
If you want the full cheesecake experience, crush up a cracker (or digestive biscuit works too) and create a hole in the centre of your ice cream. Add the crushed cracker and hit “Mix-In.” It distributes little crunchy bits throughout, mimicking that classic cheesecake base.
Texture Troubleshooting:
If your ice cream comes out icy, the strawberries might have too much water content. Next time, try draining some of the liquid after blending, or add an extra tablespoon of cream cheese for more fat.
Some strawberries are naturally more tart than others. Taste your puree before freezing and adjust the sweetness. I’ve learned that erring on the slightly-too-sweet side works better, as flavours mellow when frozen.
Storage Tips:
This one’s best eaten fresh, but if you need to store it, smooth the top, replace the lid, and keep it flat in the freezer. When you want to eat it again, let it sit on the counter for about 10 minutes, then run the “Ice Cream” setting again. Might need a re-spin or two to get back to proper consistency. The cream cheese helps prevent it from getting rock hard, which is brilliant.
Ninja Creami Recipe #4 – Coffee Lovers’ Dream Ice Cream
Right, hands up who needs coffee to function in the morning? Yeah, me too. This recipe combines my two great loves: caffeine and ice cream. It’s basically an affogato you can eat with a spoon, and it’s become my afternoon pick-me-up on work-from-home days.
Ingredients:
- 1 cup strong brewed coffee, cooled (or cold brew)
- ½ cup heavy cream
- ¼ cup sweetened condensed milk
- 2 tablespoons coffee liqueur (optional, but lovely)
- 1 tablespoon instant coffee granules
- 1 teaspoon vanilla extract
Equipment and Ingredients:
- Vittoria Espresso Coffee – strong, proper coffee flavour
- Nestle Sweetened Condensed Milk – adds creaminess and sweetness
- Kahlua Coffee Liqueur – optional but magnificent

Preparation:
Brew your coffee strong… like, really strong. I’m talking double your usual coffee-to-water ratio. Let it cool completely. Coffee ice cream is perfect for those who love their caffeine fix in frozen form, and the stronger your coffee, the more pronounced that flavour will be after freezing.
While the coffee’s cooling, combine your heavy cream and sweetened condensed milk in the Creami pint. The condensed milk is doing double duty here, sweetening and adding body. It’s one of those ingredients that makes everything taste more luxurious.
Once your coffee’s cool (warm liquid will start melting things, and we don’t want that), add it to the pint. Stir in your instant coffee granules. I know this seems redundant, but trust me, it intensifies the coffee flavour without adding more liquid. It also helps avoid iciness.
Add your vanilla extract and coffee liqueur if using. The alcohol actually serves a purpose beyond flavour, it lowers the freezing point slightly, which can help with texture. Though honestly, I mainly add it because it tastes incredible.
Mix everything thoroughly and pop it in the freezer. The usual drill, no lid, 24 hours, all that jazz.
When frozen, process on “Lite Ice Cream” setting. Coffee recipes can sometimes be a bit more prone to iciness because, well, coffee is mostly water. The condensed milk and cream should prevent this, but if it looks icy after the first spin, definitely re-spin.
Customisation Ideas:
Sometimes I’ll add a tablespoon of cocoa powder for a mocha variation. Or swirl through some chocolate sauce after spinning. I’ve also done a white chocolate version by melting white chocolate chips with a bit of the cream before mixing, that’s dangerously good.
For an even more intense coffee hit, I’ve frozen coffee in ice cube trays and added a couple of cubes to the mix before the final spin. The texture’s a bit different, almost like a coffee granita mixed with ice cream, but it’s brilliant on hot days.
Best Time to Enjoy:
This one’s perfect as an afternoon dessert, obviously. But I’ve also had it for breakfast (don’t judge me) when I needed something cold and energising. The caffeine content is real and maybe don’t have this before bed unless you’re planning an all-nighter.
Serving it in a chilled bowl with a shot of hot espresso poured over the top (proper affogato style) is absolutely divine. The hot coffee slightly melts the ice cream, creating this gorgeous coffee sauce situation. I often do this when I’ve got mates over and want to look fancy without actually putting in much effort.
Ninja Creami Recipe #5 – Triple Chocolate Fudge Brownie

This was the recipe that converted my teenage nephew. He’s at that age where anything “healthy” is automatically suspicious, but one spoonful of this and he was asking me to make more. This is pure chocolate decadence, no apologies, no guilt, just amazing.
Ingredients:
- 1 cup whole milk
- ½ cup heavy cream
- ¼ cup chocolate syrup (like Hershey’s)
- 3 tablespoons cocoa powder (Dutch-processed is best)
- ⅓ cup sweetened condensed milk
- 2 oz dark chocolate, melted
- 2 small brownies, cut into chunks
- 2 tablespoons chocolate chips
Product Links:
- Cadbury Drinking Chocolate – rich chocolate base
- Lindt Excellence Dark Chocolate – melts beautifully
- Betty Crocker Brownie Mix – or make your own

Step-by-Step Method:
Pour your whole milk and heavy cream into the Creami pint. This base is intentionally rich because we’re going for full indulgence here. Mix them together with a whisk.
Add your chocolate syrup straight from the bottle. This adds immediate chocolate flavour and helps with the creamy texture. Stir it through until the milk mixture turns a lovely chocolate colour.
Sift in your cocoa powder—this is crucial for avoiding lumps. I learned this the hard way when I had chocolate powder bombs in my first attempt. Dutch-processed cocoa gives you that deep, smooth chocolate flavour without bitterness. Mix vigorously until completely dissolved.
Pour in your sweetened condensed milk. This adds sweetness and that thick, fudgy quality we’re after. It’s basically cheating in the best possible way with instant richness without any effort.
Melt your dark chocolate in the microwave (20 seconds at a time, stirring between) until smooth. Let it cool for a minute so it doesn’t curdle the milk, then stir it into your mixture. The melted chocolate adds depth and that perfect “fudge” quality.
Mix everything thoroughly until you’ve got a smooth, uniform chocolate mixture. It should smell absolutely incredible at this point. Freeze for 24 hours without the lid.
When it’s frozen solid, spin it on the “Ice Cream” setting. After the first cycle, it might look slightly grainy as chocolate recipes sometimes do this. Hit re-spin once or twice until it’s smooth and glossy.
Now for the best part, creating chocolate heaven. Use a spoon to make several holes throughout the ice cream. Break your brownies into small chunks and push them into these holes. Sprinkle your chocolate chips throughout as well.
Hit the “Mix-In” button. The machine will gently distribute the brownies and chocolate chips, giving you pockets of fudgy brownie and melty chocolate throughout.
Texture Tips:
The brownies will stay slightly softer than the ice cream, which creates this amazing contrast. I like using slightly underbaked brownies for this as they’re fudgier and create a better texture.
Don’t skip the melted dark chocolate in the base. It seems redundant with all the other chocolate, but it adds a sophisticated depth that takes this from “good” to “oh my god.”
Serving Suggestions:
This one’s incredible straight from the machine, but I also love letting it sit for about 5 minutes to soften slightly. The texture becomes almost mousse-like. Sometimes I’ll drizzle hot fudge sauce on top and add whipped cream for the full sundae experience.
Serve it in a chilled bowl with extra brownie chunks on top. I’ve also crumbled Tim Tams over it (double chocolate overload) or added a shot of espresso poured over the top for an affogato-style dessert.
Indulgence Level:
This is probably 800+ calories per pint, but honestly? Sometimes you need that. This is my “bad day at work” dessert, my “celebrating something special” treat, my “because I bloody well want to” ice cream. No regrets, just pure chocolate bliss.
Ninja Creami Recipe #6 – Tropical Mango Coconut Sorbet
For anyone who needs a dairy-free option, or just fancies something lighter and fruitier, this one’s absolutely brilliant. I came up with this after a beach holiday where I had this amazing mango sorbet. Spent weeks trying to recreate it, and this is what I landed on.
Ingredients:
- 1 cup mango puree (fresh or frozen mango, blended)
- 1 cup coconut cream (the thick stuff from a can)
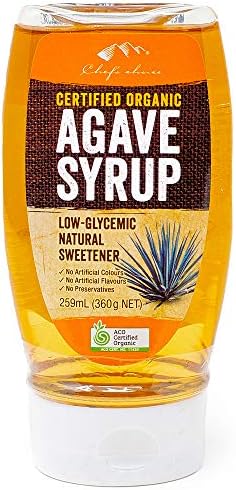
- ¼ cup agave syrup or maple syrup
- 2 tablespoons lime juice
- ½ teaspoon vanilla extract
- Pinch of salt
Ingredient Sources:
- Frozen Mango Chunks – convenient and consistent quality
- Ayam Coconut Cream – thick and creamy
- Organic Agave Syrup – perfect sweetness level
Preparation Instructions:
Start with your mango. If using frozen chunks, let them thaw slightly (about 10 minutes) so they blend easier. Chuck them in a blender and puree until completely smooth. When using fresh fruit, you need to blend it properly as the Ninja Creami blade isn’t meant to cut through large chunks. No one wants chunks of frozen mango hitting them in the face.
Open your can of coconut cream and scoop out the thick cream from the top. You want the cream, not the watery liquid at the bottom (save that for smoothies or curry). The fat content in the cream is essential for creating that luscious sorbet texture without it being icy.
Combine your mango puree and coconut cream in the Creami pint. Add your agave syrup. Liquid sweeteners provide viscosity that helps create creamy texture, and agave’s mild flavour lets the mango and coconut shine through without competing.
Squeeze in your lime juice. Fresh is best here as bottled lime juice has that slightly metallic taste that can come through. The lime brightens the mango flavour and cuts through the richness of the coconut. It’s a small ingredient but makes a massive difference.
Add vanilla extract and a tiny pinch of salt. The salt enhances the other flavours without tasting salty itself. It’s like when you add salt to chocolate chip cookies, it makes everything taste more vibrant.
Mix thoroughly until everything’s combined into a uniform mixture. Freeze for 24 hours. Yes, I know sorbets freeze faster than dairy-based ice creams, but trust me, wait the full time for best results.
When frozen, process using the “Sorbet” setting. Sorbets typically need less aggressive processing than ice cream because they’re meant to be slightly icier. After the first cycle, check the texture. It should look smooth but with a slight crystalline structure, but that’s normal for sorbet.
Flavour Enhancement Tips:
Sometimes I’ll add a tablespoon of passion fruit pulp after the first spin for extra tropical vibes. The seeds add this brilliant texture and the tartness plays beautifully with the sweet mango.
You can also fold through some toasted coconut flakes using the Mix-In function. Gives you these little pockets of crunch and intensifies the coconut flavour. I buy the unsweetened ones and toast them myself for about 5 minutes in a dry pan for a totally different flavour from the sugary desiccated coconut.
For a grown-up version, I’ve added a splash of white rum (about 2 tablespoons). The alcohol prevents it from freezing rock solid, keeping the texture slightly softer, and honestly tastes like a frozen piña colada.
Perfect Summer Treat:
This sorbet is my go-to when our weather hits 35 degrees and I can’t face anything heavy. It’s refreshing, it’s fruity, and because it’s dairy-free, it somehow feels “lighter” even though coconut cream isn’t exactly low-calorie. The mind is a funny thing.
I’ve served this at barbecues, and it always disappears first. People are genuinely shocked when I tell them it’s dairy-free. The coconut cream provides all the richness you’d get from dairy without any lactose. Perfect for friends who are dairy intolerant but still want a proper frozen dessert.
Ninja Creami Recipe #7 – Salted Caramel Brownie Heaven
Right, if we’re talking indulgence, this is it. This recipe is what I make when I’ve had pretty much a rubbish week and need something that feels like a warm hug. It’s rich, it’s decadent, and yeah, it’s got more calories than the protein versions, but sometimes you need that.
Ingredients:
- 1 cup whole milk
- ½ cup heavy cream
- ⅓ cup dulce de leche or caramel sauce
- 2 tablespoons cream cheese
- 1 teaspoon vanilla extract
- ½ teaspoon sea salt
- 2 small brownies, cut into chunks
Essential Products:
Nestle La Lechera Dulce de Leche – nicer caramel flavour
Maldon Sea Salt Flakes – the good stuff
Betty Crocker Brownie Mix – or make your own if you’re keen
Detailed Instructions:
Start by combining your whole milk and heavy cream in the Creami pint. Don’t try to cut corners with low-fat milk here as this recipe needs that fat content to work properly. The richness is kind of the entire point.
Add your dulce de leche straight from the jar. If it’s particularly thick and not mixing in easily, warm it slightly in the microwave (just 10-15 seconds) to make it more pourable. Stir it through the milk mixture until you’ve got no lumps as it should look like caramel milk.
Add your softened cream cheese and mix until smooth. The cream cheese adds body and helps create that luxurious mouthfeel. It also adds a slight tanginess that balances the sweetness of the caramel.
Stir in your vanilla extract and sea salt. Using the right salt and caramel combination creates a perfect salted caramel flavour that isn’t too overpowering. Don’t use table salt as sea salt or Himalayan salt gives you that nicer salted caramel flavour without the harsh chemical taste.
Mix everything thoroughly. Taste it at this point (I always do) it should taste quite sweet because sweetness dulls when frozen. If it’s not sweet enough, add another tablespoon of dulce de leche.
Freeze for 24 hours. I know, I know, I sound like a broken record, but proper freezing is especially important for this recipe because of all the sugar and fat.
While that’s freezing, sort out your brownies. You can use leftover homemade brownies (if such a thing exists in your house), shop-bought ones, or make a small batch from a mix. Cut them into chunks about 1cm square as you want them small enough to distribute but large enough to get proper brownie bites.
When your base is frozen solid, process on “Ice Cream” setting. It’ll likely need a re-spin or two because of the dulce de leche’s viscosity. Don’t panic if it looks a bit grainy after the first spin as that’s normal.
After achieving smooth ice cream, create that centre hole again and add your brownie chunks. Hit “Mix-In” and let it distribute the brownies throughout. The brownies will stay slightly softer than the ice cream, creating this amazing textural contrast.
Make-Ahead Options:
You can totally prep multiple pints of the base and keep them in the freezer, then add fresh brownies when you’re ready to eat. The brownies stay softer and taste better when they’re freshly mixed in rather than frozen in the base from the start.
I’ve also done a version where I swirl through extra dulce de leche after the first spin, creating ribbons of pure caramel throughout. It’s almost too much, but also… sometimes you need almost too much.
How Do You Prevent Icy Ninja Creami Desserts?
Look, I’m going to be honest with you, this was my biggest frustration when I started. Following recipes exactly, and still ending up with desserts that had the texture of a snow cone rather than ice cream. Let me share what I’ve learned through many disappointing batches.
The enemy of creamy ice cream is water. Simple as that. Having a creamy element in your Ninja Creami recipe ensures you have enough viscosity to create non-icy ice cream. This means adding ingredients with fat and/or proteins that interfere with ice crystal formation.
Fat is Your Friend
Despite what diet culture might tell you, fat is absolutely essential for proper ice cream texture. It coats your tongue and prevents those harsh ice crystals from being noticeable. This is why full-fat dairy always works better than skim. I’ve tested this side-by-side multiple times, and the difference is night and day.
If you’re trying to keep calories low, you can’t eliminate fat entirely. But you can be strategic about it. A tablespoon of heavy cream goes a long way. Two tablespoons of peanut butter add richness without derailing your macros. Even a teaspoon of melted coconut oil can help.
Stabilisers Aren’t Evil
The word “stabiliser” gets a bad rap, but just ⅛ teaspoon of xanthan gum helps thicken things up and stops ice cream from going icy. It’s the same stuff used in commercial ice cream, just in smaller quantities. Bob’s Red Mill sells it, and one bag will last you literally years since you use so little.
Alternatively, sugar-free pudding mix works as a stabiliser. About 10 grams (roughly a tablespoon) adds thickness and helps with texture. Some people swear by unflavoured gelatin or collagen powder too. Collagen powder enhances creaminess without using pudding mix, and it has the added benefit of being good for your joints and skin.
Sugar Type Matters
Here’s something that surprised me: liquid sweeteners like agave syrup, maple syrup, and simple syrup add body, stability, and creaminess to ice cream. Granulated sugar can sometimes leave a slightly grainy texture if it doesn’t fully dissolve. Liquid sweeteners incorporate smoothly and actually improve mouthfeel.
Honey’s brilliant for this too. The viscosity helps create that smooth texture we’re after. Plus, different honeys have different flavour profiles, which can add complexity to your ice cream. I’ve got about five different types in my pantry specifically for Creami experiments.
Protein Powder Selection
Not all protein powders are created equal for ice cream making. Whey/casein blends usually create the best texture, while pure whey can get a bit icy unless you add extra fat. Plant proteins are trickier as they typically need more help from added fats and stabilisers to get right.
I’ve found protein powders that already contain thickeners (check for guar gum or xanthan gum in the ingredients) perform better. They’re essentially doing some of the work for you. My go-to is a whey-casein blend with added digestive enzymes, seems to give the smoothest results consistently.
Freezing Properly
Even with perfect ingredients, improper freezing can cause issues. Your freezer temperature matters, if it’s not cold enough, your ice cream won’t freeze completely solid, and you’ll end up with icy bits. Most freezers should be at -18°C or lower.
Also, position in the freezer matters more than you’d think. The door is the warmest spot (temperature fluctuates every time you open it), so keep your pints toward the back on a middle shelf. I’ve got a dedicated spot in my freezer now where all my Creami experiments live.
What Ingredients Make Ninja Creami Ice Cream Extra Creamy?
After several experiments (seriously, my freezer looks like a Creami shrine at this point), I’ve figured out the magic formula. It’s not just one ingredient, it’s the combination and ratios that matter.
The Cream Cheese Trick
This changed everything for me. Just 2-3 tablespoons of softened cream cheese in your base creates an incredibly smooth texture. Adding cream cheese to Ninja Creami recipes guarantees an always creamy dessert that scoops beautifully straight from the spin. The fat content helps, but it’s more than that, cream cheese has this unique protein structure that stays smooth even when frozen.
Philadelphia is my go-to because it’s reliable and consistent. I’ve tried store brands, and they work fine too. Just make sure it’s softened before adding, cold cream cheese creates lumps that are impossible to mix out, and nobody wants cream cheese chunks in their ice cream.
Protein Powder Selection
The type of protein powder genuinely matters. Casein-based or whey-casein blends create the smoothest texture because casein mimics the proteins in ice cream. Pure whey isolate can work but tends toward iciness unless you compensate with extra fat.
I’ve tested about a dozen different brands, and here’s what I’ve found: protein powders that mix smoothly in shakes also work best in ice cream. If your protein powder gets clumpy in water, it’ll probably cause issues in the Creami too.
Liquid Sweetener Benefits
Granulated sweeteners can crystallise when frozen, creating a grainy texture. Liquid sweeteners like maple syrup, honey, agave nectar, or even sugar-free syrup alternatives incorporate smoothly and actually improve mouthfeel.
The viscosity of liquid sweeteners adds body to your base. It’s not just about sweetness, it’s about creating that thick, syrupy quality that translates to creaminess in the final product. I usually use 2-3 tablespoons in a pint, depending on how sweet I want it.
Fat Content Guidelines
Here’s the thing about fat: you can’t make creamy ice cream without it. You can minimise it, but you can’t eliminate it entirely. The fat coats your tongue and prevents you from detecting ice crystals as harshly.
For low-calorie versions, aim for at least 5-8g of fat per pint through ingredients like:
- 1-2 tablespoons peanut butter or almond butter
- 2-3 tablespoons cream cheese
- ¼ cup heavy cream
- A tablespoon of MCT oil or coconut oil
For the best indulgent ice cream, you want 15-20g of fat minimum. This is where heavy cream, full-fat dairy, and nut butters become your best friends.
Do You Really Need to Freeze Ninja Creami Ice Cream for 24 Hours?
Alright, let’s address the elephant in the room. Everyone wants to know if they can cheat the 24-hour freeze time. I’ve tested this extensively because, let’s face it, sometimes you want ice cream NOW, not tomorrow.
Official Recommendations:
Ninja officially recommends 24 hours. Their reasoning is solid, as your base needs to be completely frozen solid, all the way through, for the blade to properly shave it into that smooth texture. If there are any soft spots, the blade can’t do its job properly.
I’ve followed this guideline religiously, and it does consistently produce the best results. There’s no guessing, no disappointment, its just reliably good ice cream every time.
Time-Saving Shortcuts:
But I’ll level with you, I’ve successfully made ice cream in as little as 12 hours. Here’s how:
– Use a colder freezer setting (mine goes down to -23°C)
– Freeze your empty Creami pint beforehand so it’s already cold
– Make your base with slightly less liquid (reduce by 2-3 tablespoons)
– Place the pint in the coldest part of your freezer (usually the back, middle shelf)
The texture isn’t quite as perfect as the 24-hour version, and you’ll almost certainly need to re-spin at least once. But if you’re desperate for ice cream and only have half a day, it can work.
Quick-Freeze Methods:
Some people swear by using an ice bath before freezing. Mix your base, then place the sealed pint in a bowl of ice and water for 30 minutes to get it really cold before putting it in the freezer. Does this work? Sort of. It might shave off an hour or two, but it’s not the game-changer you’d hope for.
I’ve also tried making bases with partially frozen ingredients, like using frozen fruit straight from the freezer rather than thawed. This helps a bit, but you need a decent blender to handle frozen fruit, and it only saves you maybe 2-3 hours maximum.
Quality Comparison:
Here’s the honest truth: 24-hour frozen ice cream is noticeably better. It’s smoother, creamier, and needs less re-spinning. The 12-16 hour versions work in a pinch but aren’t quite as good.
If you’re meal prepping or planning ahead, just freeze multiple pints at once. That way you’ve always got a properly frozen base ready to go. I usually have 3-4 in the freezer at any given time, different flavours for different moods.
The one exception: sorbet and gelato bases sometimes freeze faster because they have different compositions. I’ve had decent sorbets at 18 hours. But for ice cream, especially protein-heavy versions, give it the full day if you can.
Product Comparison: Essential Ninja Creami Supplies
After using this machine nearly daily for over a year, I’ve got strong opinions on what works and what doesn’t. Here’s a breakdown of the best products I’ve found.
| Product Category | Best Option | Why It Works |
|---|---|---|
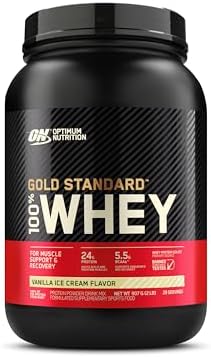
| Protein Powder | Optimum Nutrition Gold Standard Whey-Casein Blend | Mixes smoothly, great texture, neutral flavour |
| Protein Shake (Ready-to-Drink) | Fairlife Core Power | Perfect consistency, high protein, tastes great |
| Xanthan Gum | Bob’s Red Mill Xanthan Gum | Food-grade, consistent quality, lasts forever |
| Cream Cheese | Philadelphia Original | Smooth, consistent, perfect fat content |
| Liquid Sweetener | Pure Maple Syrup or Agave Nectar | Adds body, mixes smoothly, great flavour |
| Greek Yogurt | Chobani Plain or Vanilla | Thick, high protein, creamy texture |
| Coconut Cream | Ayam Premium Coconut Cream | Thick, high fat content, consistent quality |
| Extra Pint Containers | Ninja Official Pints (2-pack) | Guaranteed fit, quality plastic, dishwasher safe |
| Kitchen Scale | Any digital scale (0.1g precision) | Essential for measuring xanthan gum accurately |
| Immersion Blender | NutriBullet or Breville | Makes mixing bases easier, reaches pint corners |
Storage Containers:
You’ll want extra pint containers. Trust me on this. The Ninja Creami comes with just one or two, and if you’re making multiple flavours or meal prepping, you need more. The official ones are worth it because they fit perfectly and you know they’ll work.
I’ve tried using random containers that looked about the right size. Don’t. They don’t fit properly, the lid situation is dodgy, and you risk damaging your machine. Just buy the real ones, they aren’t expensive, and they’ll last forever.
Mix-In Ingredients:
For mix-ins, quality matters but you don’t need to go crazy expensive:


- Chocolate chips: Lindt or Callebaut for best flavour
- Cookies: Oreos are classic, but I love Tim Tams for Aussie flair
- Nuts: Whatever’s freshest—roast them yourself for better flavour
- Fruit: Frozen fruit is often better than fresh for ice cream
Don’t Waste Money On:
Some things aren’t worth the premium price:
- Fancy stabilisers beyond xanthan gum (they don’t work better)
- Pre-made “Creami mixes” (make your own for a fraction of the cost)
- Expensive ice cream-specific protein powders (your regular protein works fine)
- Dedicated ice cream storage containers (the Creami pints work great)
Your Frozen Dreams Just Got Real
Look, I started this whole Ninja Creami journey as a skeptic. Another kitchen gadget that would probably end up collecting dust, right? But this machine has genuinely changed how I think about dessert, nutrition, and what’s possible to make at home.
These seven recipes are my tried-and-true favourites, the ones I come back to again and again. The classic vanilla base that started it all. The chocolate peanut butter that convinced me this machine was worth every dollar. The strawberry cheesecake that proved you could make sophisticated flavours at home. Coffee for when I need that caffeine kick. Triple chocolate fudge for when I want something nostalgic. Mango coconut for hot summer days. And salted caramel brownie for when I need pure indulgence.
But here’s the thing: these recipes are just the beginning. Once you understand the basic principles like fat for creaminess, stabilisers for texture, liquid sweeteners for body, you can create literally anything. I’ve made matcha green tea ice cream, Vegemite caramel (yes, really, and it was surprisingly good), lemon curd swirl, peanut butter and jelly, rocky road, maple bacon, and about a hundred other flavours.
Don’t be scared to experiment. Some of my best recipes came from happy accidents or weird ingredient combinations I tried on a whim. If your first attempt doesn’t turn out perfectly, just re-spin it. Or add more mix-ins. Or turn it into a milkshake. There’s no real way to completely ruin it.
The most important thing is to have fun with it. This isn’t about making perfect, Instagram-worthy ice cream every time (though you absolutely can do that). It’s about having a tool that lets you create delicious frozen treats exactly how you want them, whether that’s high-protein and low-calorie or full-fat and decadent.
Start with one of these recipes, I’d recommend the vanilla base because it’s the most forgiving and teaches you what proper texture should feel like. Then branch out. Try different protein powders, play with flavours, add weird mix-ins. Join the Ninja Creami community online where people share their creations and troubleshooting tips.
And when you make something brilliant (which you will), come back and share what you did! Drop a comment with your favourite flavour combo, your best tip, or even your biggest disaster. We’re all learning together, and honestly, some of the best advice I’ve gotten came from random people on the internet sharing their experiences.
Now stop reading and go make some ice cream. Your freezer’s waiting, and honestly, life’s too short for bad desserts.


